TerraTrove is a community-driven Minecraft server that values respect, creativity, and collaboration. Whether you're here for epic builds, economy-driven gameplay, or to meet new friends, we’re excited to have you with us!
Difficulty - Hard
Version - 1.21.8
Map size 25k x 25k
Java IP: play.terratrove.net
Java Port: 25565
Bedrock IP: play.terratrove.net
Bedrock Port: 25565
Joining on Console:
Visit this link for guides for all platforms. This server is not a realm, so there will not be any sort of invite code, and it is accessible via the 'Multiplayer' page. If you are using alternatives like Bedrock Together, please make sure the application is fully up to date.
Server Features:
Technical Details (For Farms):
Quick Navigation:
Joining TerraTrove requires whitelisting. Follow these steps to apply:
Step-by-Step Whitelisting Guide
Navigate to the #apply channel in our Discord.
At the top of our Discord server, locate the #apply channel. 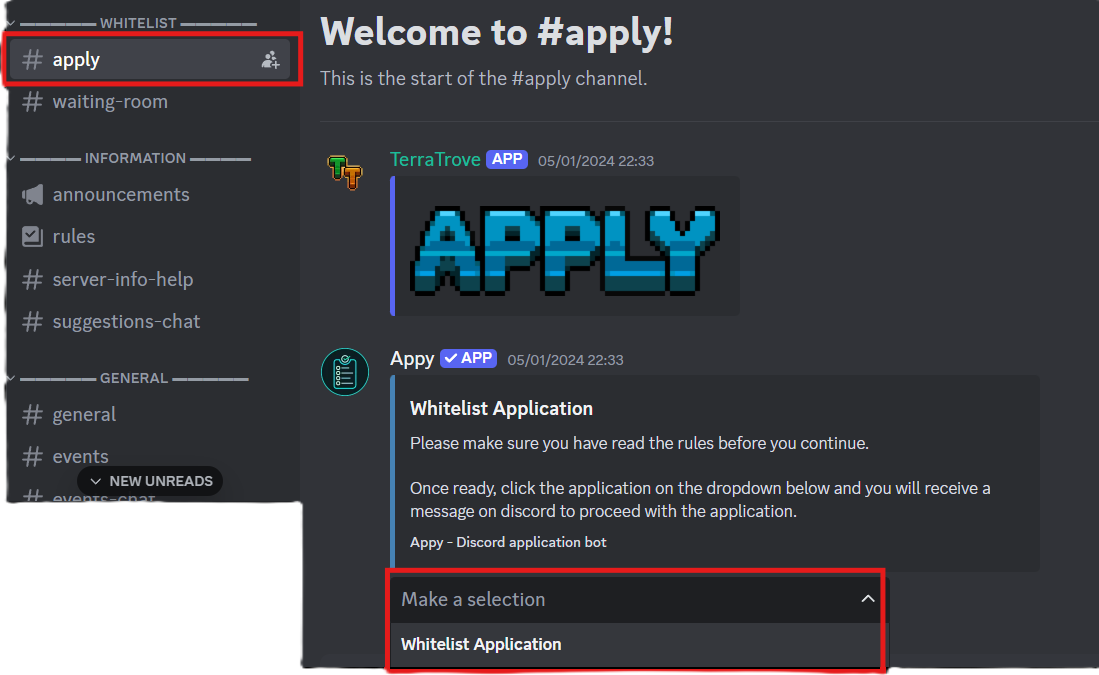
Initiate the Application
Click the drop-down menu and select Whitelist Application. Our bot "Appy" will then privately message you with an application form.
Fill Out the Form
Complete each question thoughtfully. Please avoid one-word or short-sentence answers unless prompted (like for IGN or dates), as they may result in denial without reasoning.
Submit Your Application
Once complete, submit the form by clicking the submit button. After Staff review, Appy will message you to confirm whether you’ve been accepted.
Note: Please do not message or ping staff members about your application status. Your patience is appreciated!
Navigating TerraTrove is easy and enjoyable when you’re familiar with our travel systems, community map, and respectful guidelines for exploring and building. Here’s everything you need to know to get around safely and smoothly.
Using the TerraTrove Map
Our online server map is your best friend for finding locations and planning your travels across TerraTrove. The map lets you track your position, locate important points of interest, and see player-built areas in real time.
How to Use the Map:
Using the map first will help you identify your destination, plan a safe travel route, and ensure you don’t accidentally build or settle in claimed areas.
Fast Travel via the Nether Hub
Once you’ve found your destination on the map, our Nether Hub offers the fastest way to travel there. Located on the Nether roof at [0, 128, 0], the hub’s highways extend up to 1250 blocks in each cardinal direction, allowing quick access to distant areas in the Overworld.
Why Use the Nether Hub?:
In Minecraft, the Nether compresses distances; traveling here is much faster than in the Overworld. Using the Nether highways, you can reach far-off locations, distant player bases, and unique biomes more efficiently.
Note: If you want to add side paths or portals, please ensure they don’t obstruct main routes. This keeps travel smooth for everyone.
Respecting Bases, Claims, and Public Areas
Be Mindful of Other Players’ Bases and Claims
To maintain a positive and cooperative environment, respect others’ builds and land claims. When setting up a new base or project, keep a respectful distance from existing structures, and avoid interacting with private farms or builds unless you have permission from the owner. Suppose you are interested in building or taking over an inactive player's land claims. In that case, the player must be inactive for a period of 30~ days before the claim becomes inactive and their items can be distributed or given to others.
Key Reminders:
By familiarizing yourself with the map, using the Nether Hub for efficient travel, and respecting player spaces, you’ll enjoy exploring TerraTrove while contributing to a welcoming community atmosphere. Safe travels, and happy exploring!
In this section, everything you need to know regarding spawn, such as key buildings and core mechanics, can be found right here!
Spawn Portal
Welcome to our world spawn! The first thing you'll see will be our spawn portal, which is central to the spawn region and takes you directly into our Nether Hub, located at [0, 0].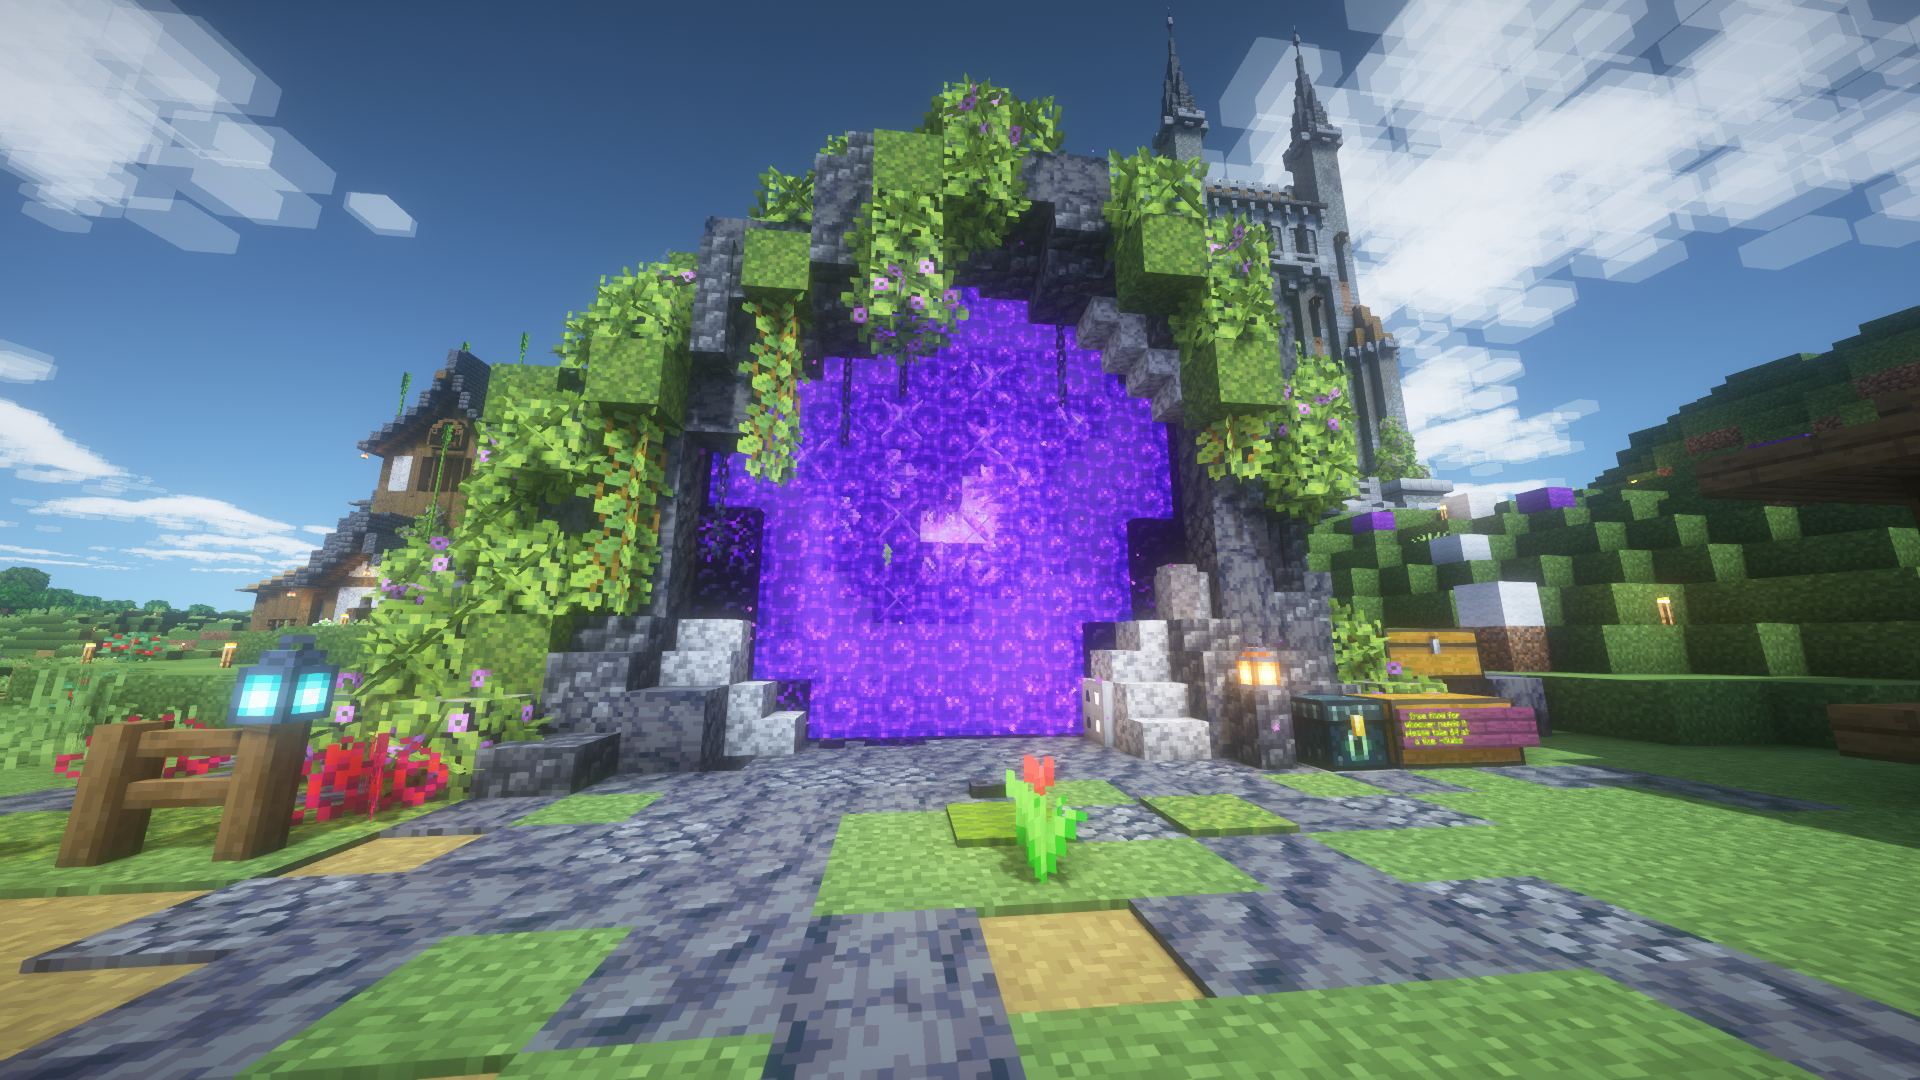
Blacksmith
Time to collect some starter gear from our Blacksmith building located at [36, 42]. Here, you can tap a button on the floor of the Blacksmith to receive a fresh set of starter gear from the water column in the middle of the forge. Please only press the button once, as we want to ensure every new player can get a set of iron tools and armor, as well as food and some blocks to get started.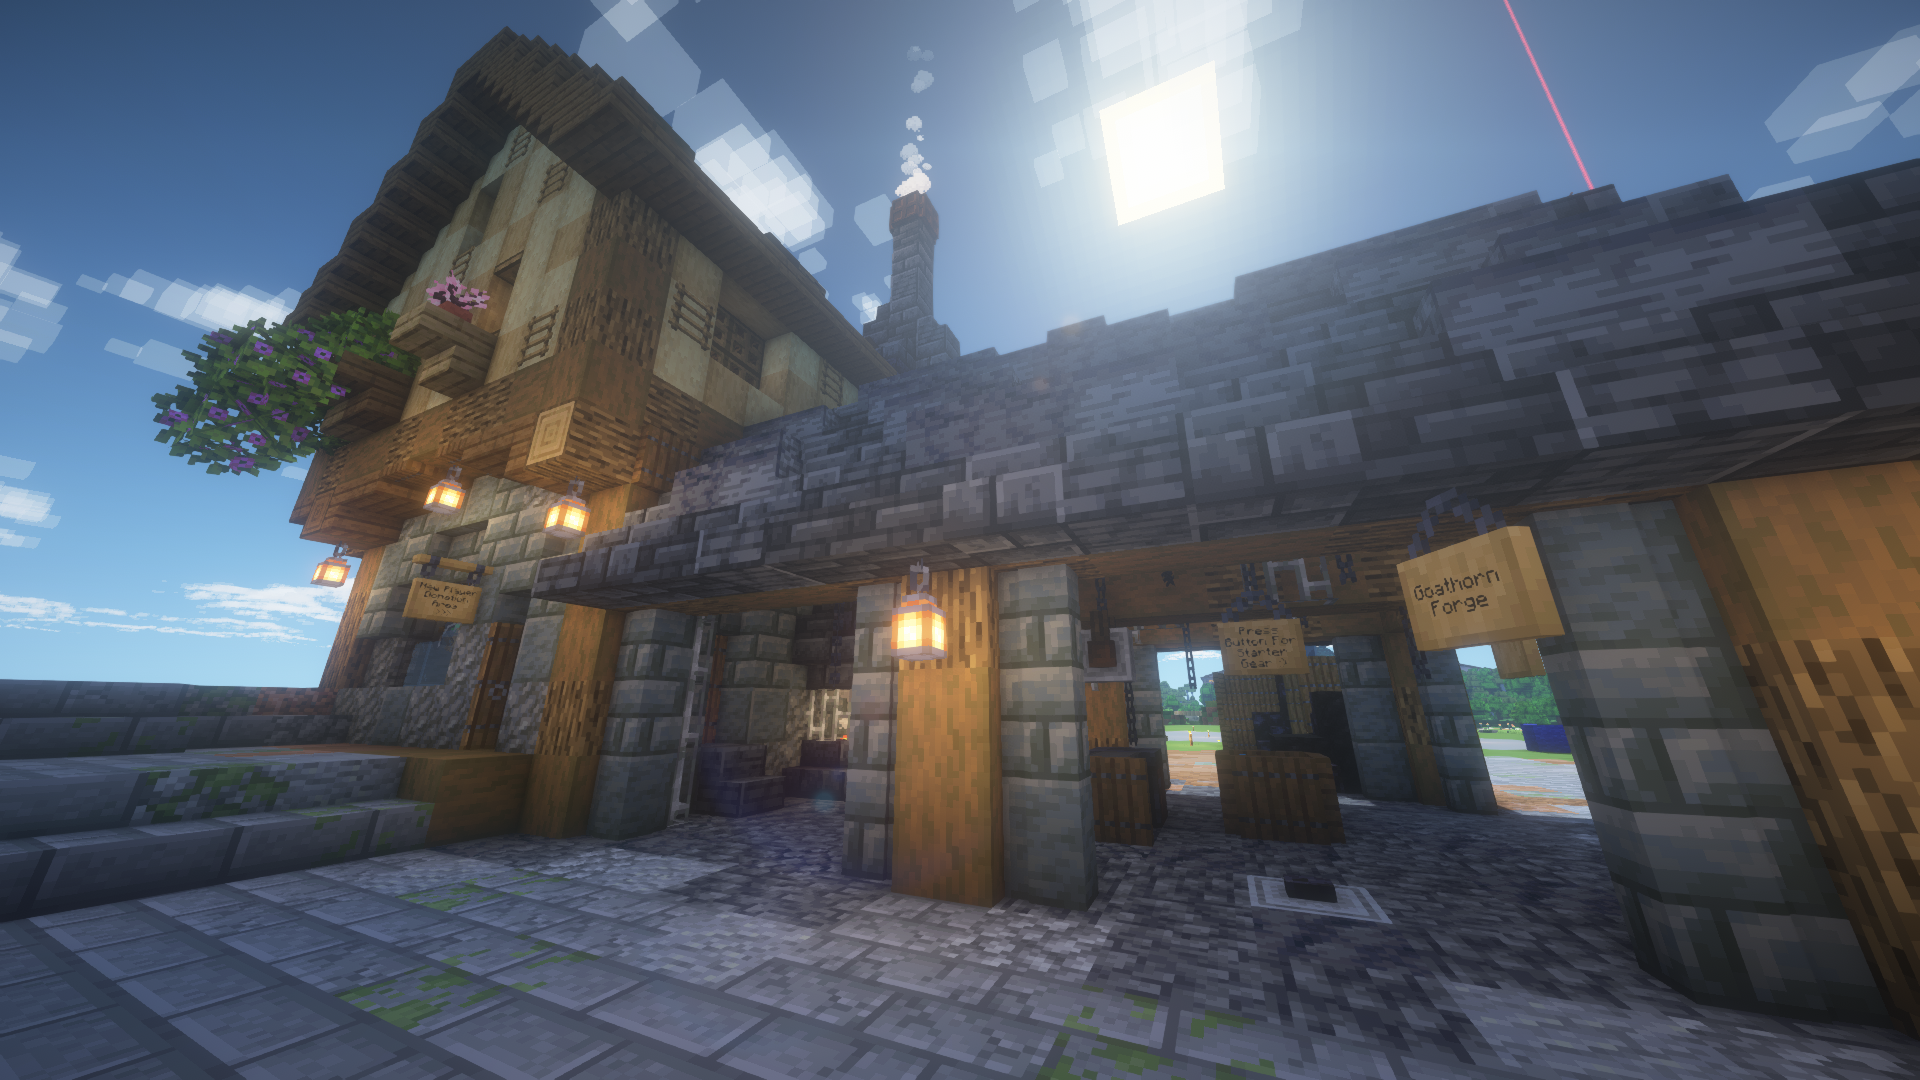
Shopping District
Our server's shopping district is located directly across the river from the spawn portal and village, beginning at [-40,40]. Here you can explore different kinds of shops and builds that are created by the rest of the community on TerraTrove. If you are looking to purchase items or set up your own shop, check out our 'Shop and Economy Guide' and our #shops-trading channel on Discord accordingly.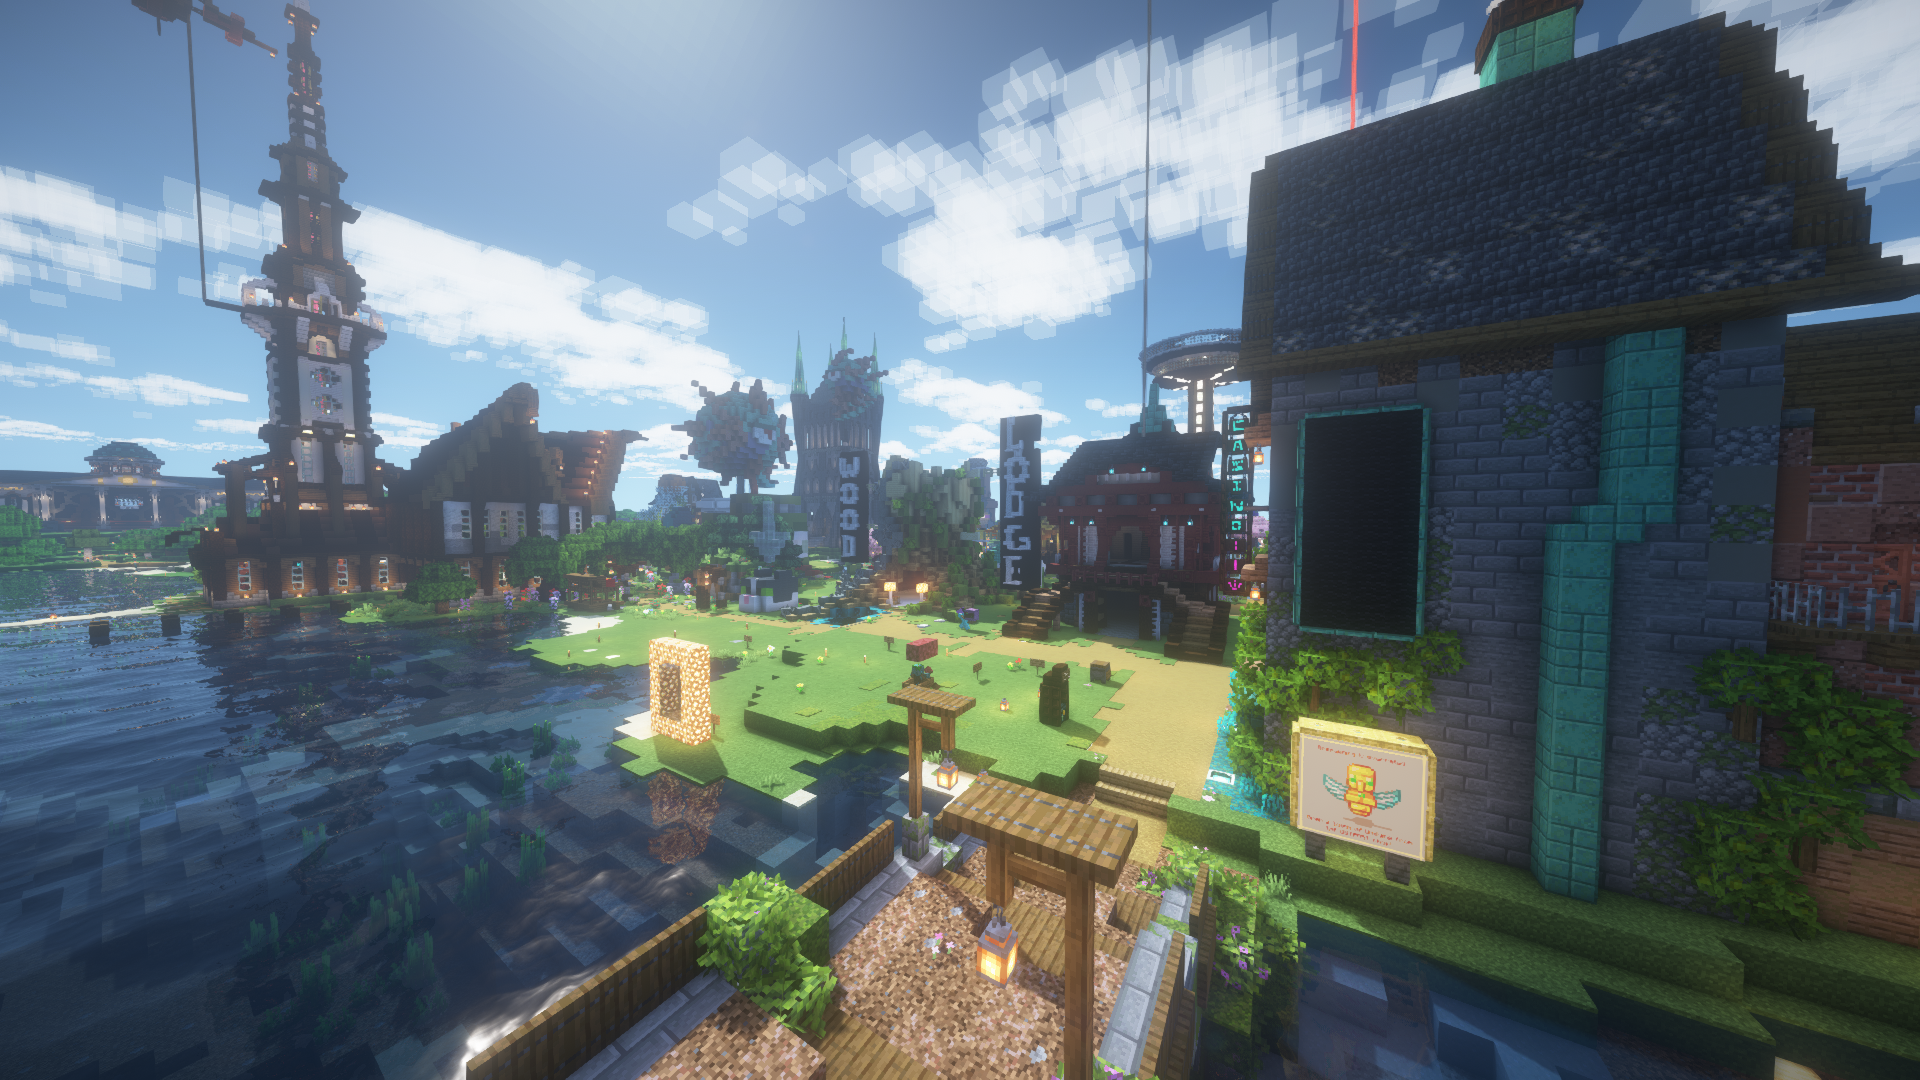
Post Office
The TerraTrove Post Office is meant to be a place where players can connect with one another and meet up to send and receive items. Located at [-54,-45], you can drop in anytime you'd like to claim an empty post box, chat with other players, and drop items off. Remember to read the 'PO Manual' and the post box "Registry' when you enter to the left to keep in touch with the rules.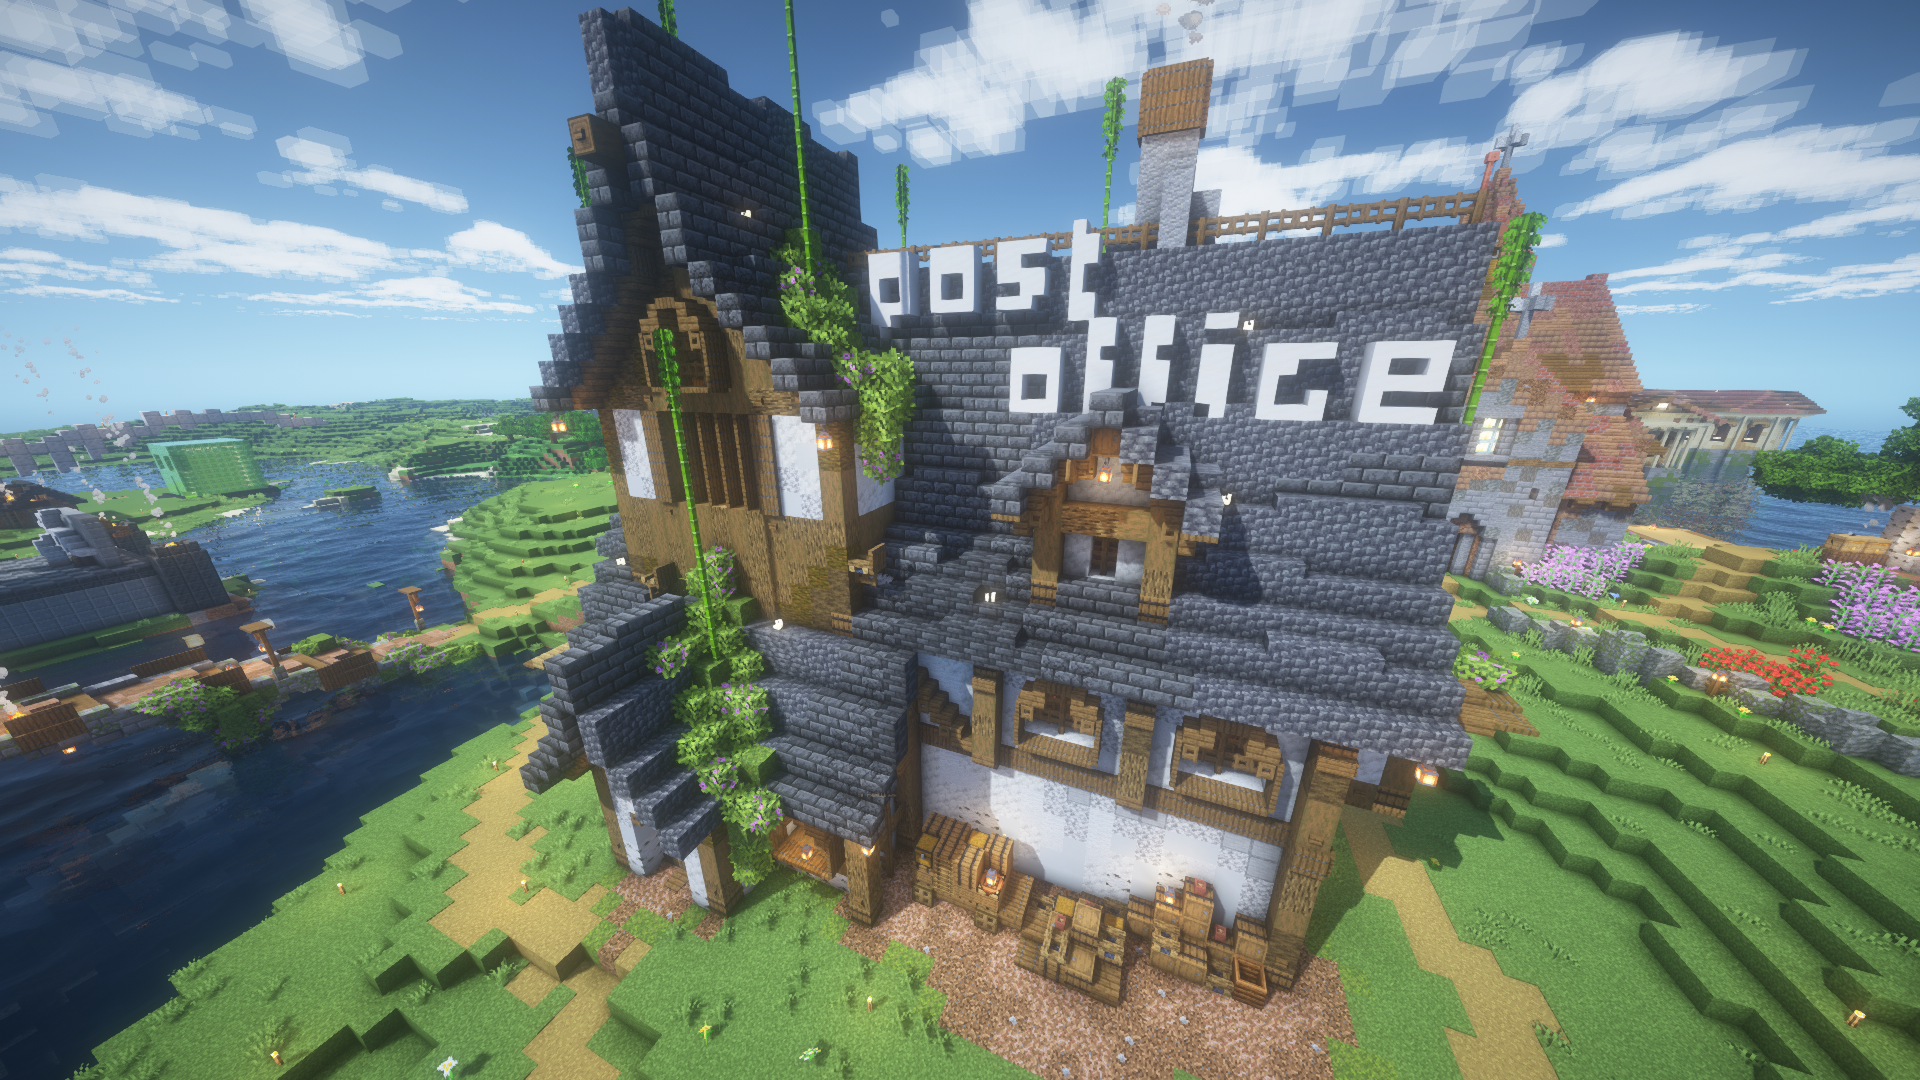
Base Graveyard
Located directly behind the Post Office is the server's Base Graveyard at [-10, -92]. Here, inactive players who have been offline for a period of 30~ days have items from the base locations placed inside this building, allowing other players to pick through and take anything they need. The chests in here are unsorted, and items are dumped in them at random intervals, all on a first-come, first-served basis.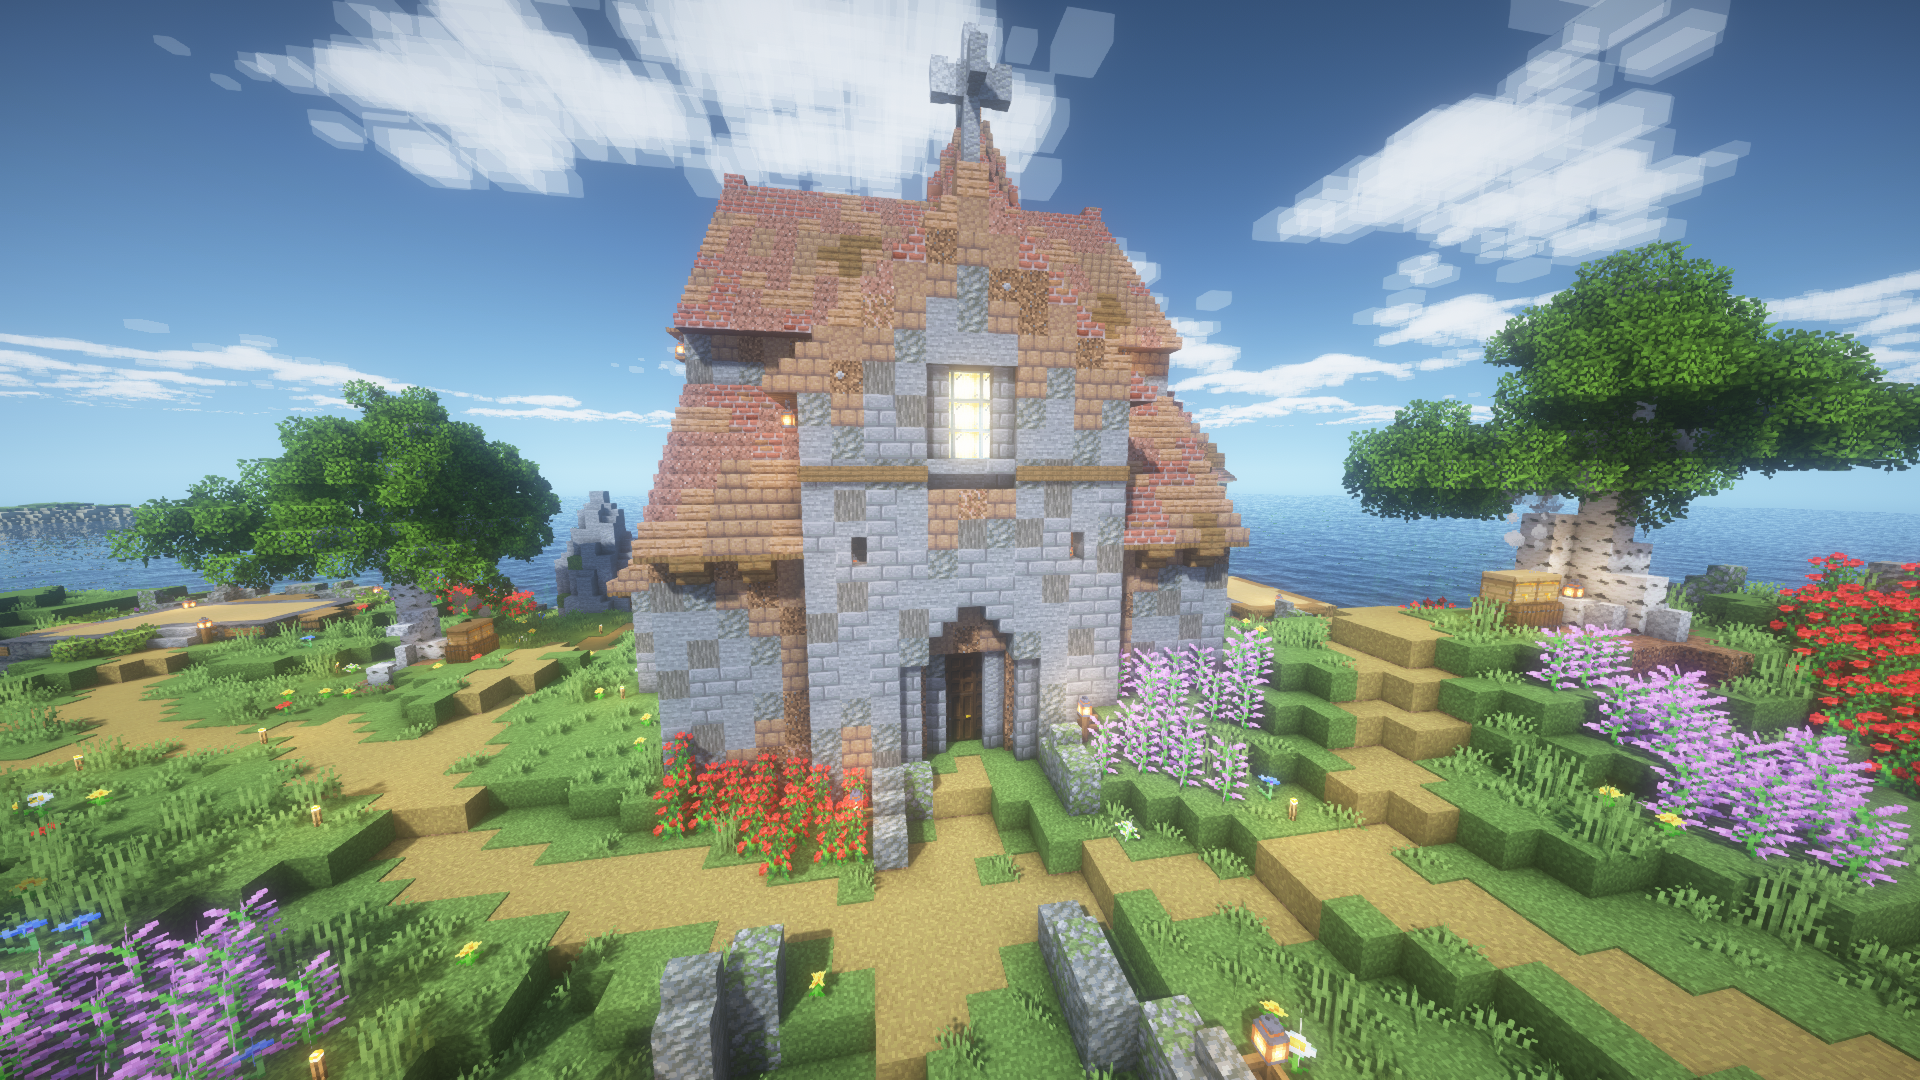
Advancement Hall
Located outside of the immediate spawn area, but still just down the path, is our server's Advancement Hall at [-23, 417]. Directed by the A.M.O.G.U.S. team, this building houses items critical to gaining advancements within the Blaze and Cave's Advancement packs, which are additional data packs intended to make gameplay on TerraTrove more meaningful and fulfilling. Feel free to help the team out by visiting their thread on Discord.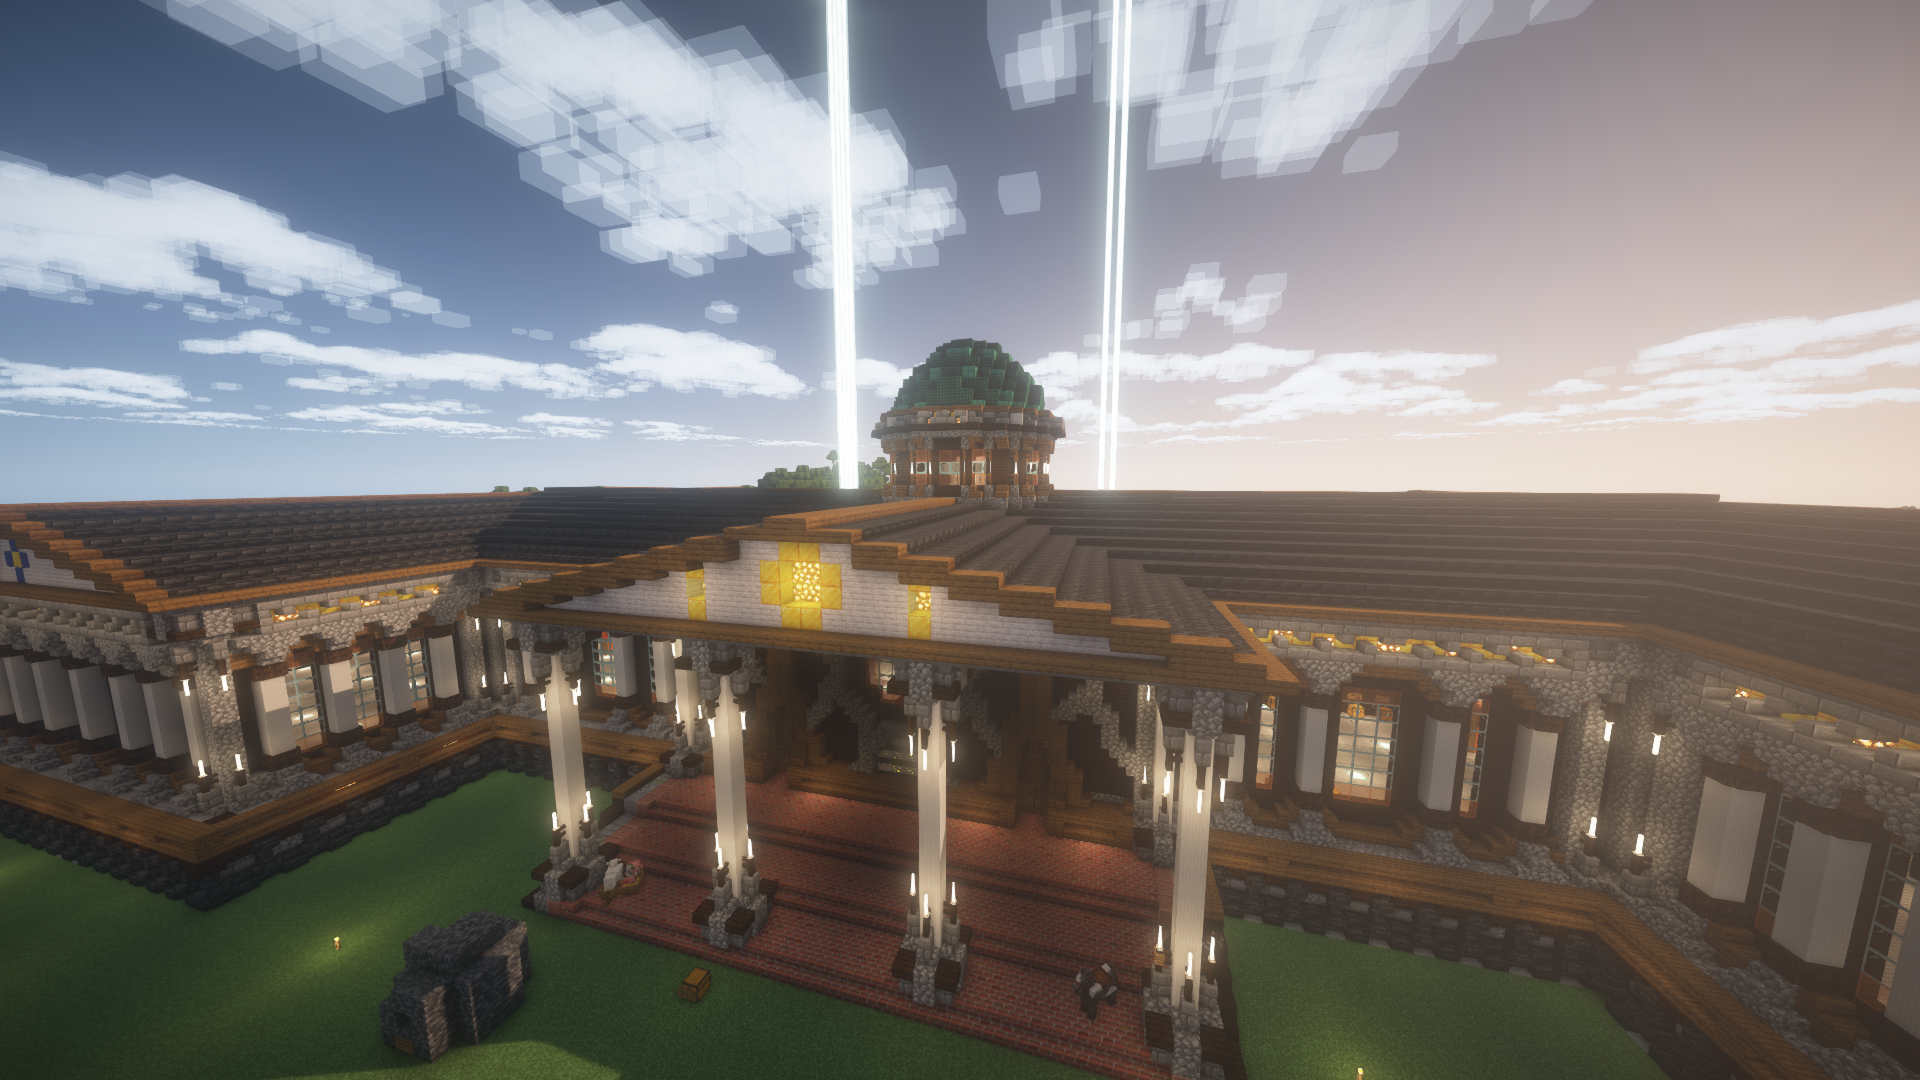
Nether Hub
After exploring the spawn overworld, venture through our Spawn portal at [0, 0] and you'll arrive at our server's public Nether Hub at [0, 128, 0]. The Nether hub and highway system is located on the top of the Nether roof, making it easier for players to navigate the world and visit other community members. There are Nether ice highways spanning in all cardinal directions, allowing for speedy boat travel.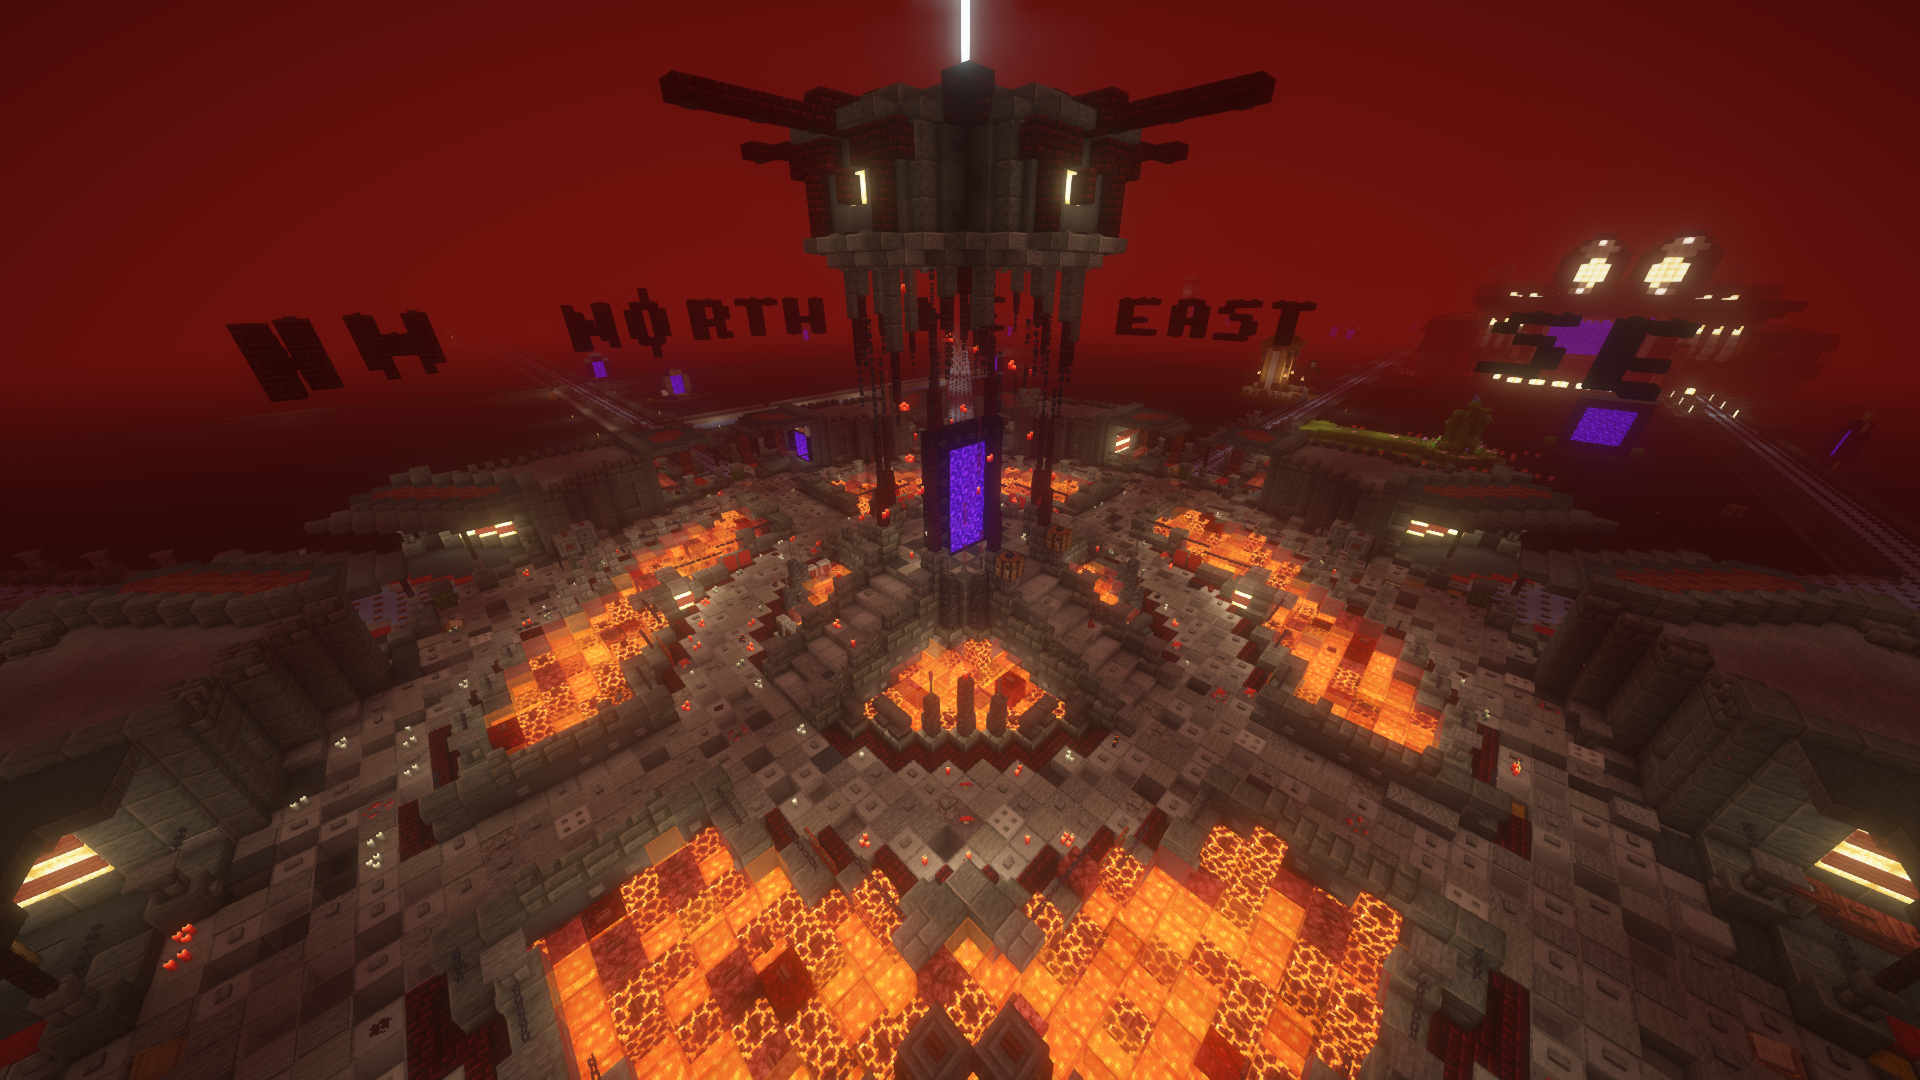
Public Villager Trading Hall
Located directly outside spawn above the ocean, is our Villager Trading Hall at [64, -258] in the overworld and [8, -32] in the Nether. Here, you can easily trade emeralds to all villager professions for base building materials, enchanted books and gear, food, and more. Using the lever system, you can also easily cure each individual villager within the Hall to reduce their prices for yourself if you wish.
Note: Our server uses 'Bonk' plugins that remove Villager and Mob AI if they are named 'Bonk' using a nametag. If you'd like to cure a villager, you will need to rename the villager using a random nametag, cure them, and then promptly rename the villager back to 'Bonk', as the area would be overloaded with entities if the villager AI remained active. If you have further questions, please ask a staff member.
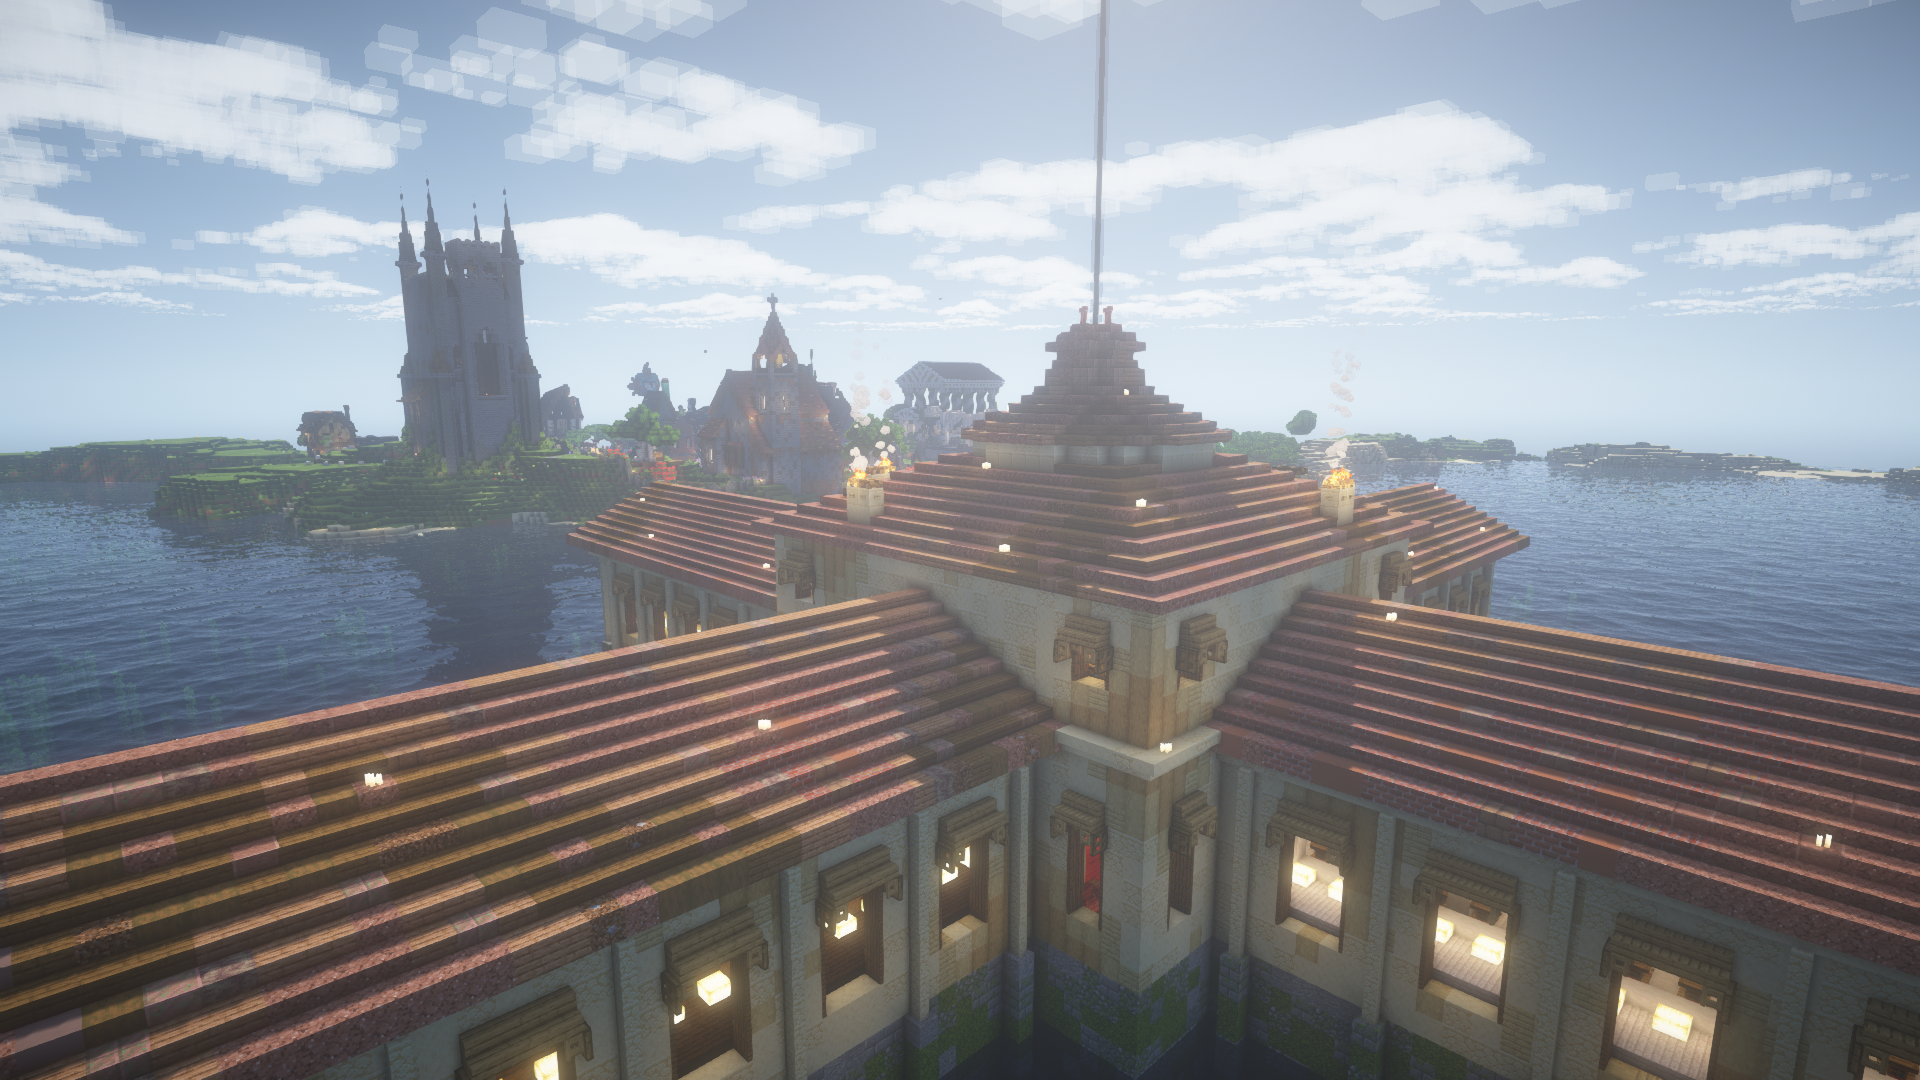
This section is currently under maintenance as we continue Season 4, and will be continuously updated throughout the season as spawn develops and important buildings are constructed. If you would like to stay updated on Spawn construction, please visit our Spawn Development Thread on Discord.
Welcome to the Economy and Shopping District guide! TerraTrove’s economy is based on a player-driven diamond system, with a designated shop district near spawn to facilitate trading and resource exchange. Here’s everything you need to know to get started. Please keep in mind that this is just the current system we are continuing to use and develop throughout Season 4, so shop mechanics and approval requests are subject to change.
Economy Overview:
The currency on our server is diamonds. Use them for transactions, trades, and shop purchases. Whether you're gathering resources or trading with others, diamonds are central to our economy. So get mining, and start building your wealth! To keep the economy healthy, there will be no public farms and no items sold for free. There must always be a minimum price of at least 1 diamond when selling anything unless prior approval is obtained from staff.
Shopping District:
The Shopping District is a 500-block radius around spawn, reserved for player-owned shops and public builds. Here, you can buy and sell items, services, and resources with other players. Before setting up your shop, ensure you read through the following guidelines and approval steps.
Shop Location and Approval:
To open a shop, head to the Shops-Trading Channel on Discord and submit your request.
Check Available Spaces
Use our dynamic map to locate the designated spawn area and find a spot for your shop. This map will help you explore the current shops and select your preferred location within the 500x500-block spawn area.
Submit a Shop Approval Request
In our Shop Approvals Discord channel, follow the directions listed on how to post a shop request. Please ensure that your shop requests are filled out correctly.
Shop Signs:
To configure your shop signs;
[shop].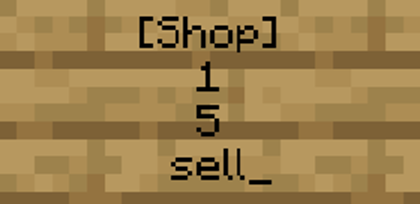
The sign should look like the one above.
After setting up the sign, hold the item you want to buy/sell and left-click the sign.
Important: Leave at least one slot empty in the chest for payment/items to be stored when purchases are made. If there are no slots available the transactions will not go through.
Checking Shop Status:
Once your shop is stocked and ready, the [shop] text on your sign will glow green to indicate it’s operational. If the shop runs out of stock, the text will change to red, letting you know it’s time to restock. You can also left-click a shop chest to see how much stock is available.
Note: Keep an eye on your inventory to ensure your shop is always available for business.
Keeping Your Shop Active:
If your shop remains out of stock for longer than 15 days, the shop chest sign will automatically reset, and the chest will revert to a normal chest. If you do not restock or have no plans to restock, the shop will default, allowing other players to claim the shop space.
Additionally, if the shop owner is inactive for more than 30 days, the shop will also default, making the shop space available for other players to claim.
To prevent this, players must keep their shops stocked and active. If a player needs to be inactive for an extended period but wishes to retain their shop, they must notify a staff member in advance.
With these steps, your shop will be ready for players to visit and trade! We look forward to seeing your creativity and unique shops in TerraTrove’s vibrant economy.
/commands - Shows all useful commands in-game.
Most used:
/lb/stats - Links you to our leaderboards/stats page./map - Links you to our online live map./sit - Makes your in-game character sit.[pos] - Show your position in the #mc-global channel and in the in-game chat./seen [playername] - Show the time that the player was last seen./myhead - Gives you your own head.
Banner design tools:
/bm - Open main gui for the banner maker./bm hand - View banner info of the banner in your hand./bm see - View banner info of the banner you're looking at./bm view - View banner info of the banner command
Chat:
[i] - Show the item in your main hand in #mc-global and the in-game chat.[inv] - Show your inventory in the #mc-global channel and in the in-game chat.[pos] - Show your position in the #mc-global channel and in the in-game chat.[ender] - Show your enderchest in the #mc-global channel and in the in-game chat./voicechat - Lists all possible commands used alongside Simple Voice Chat./party - Lists all possible commands used to create and manage in-game party chats.
Container privacy:
/bolt lock /bolt unlock - Locks/unlocks containers (click on the container afterward)./bolt transfer [playername] - Transfers container ownership to another player (click on the container afterward)./bolt edit (add|remove) [playername] - Adds/removes a player from entering a private container (click on the item afterward)./bolt modify (add|remove) normal (group|password|player) - Adds/removes access for groups, passwords, or players./bolt trust (add|remove) player [playername] - Adds/removes a player to all of your private containers./bolt trust (add|remove) player [playername] admin - Adds/removes a player to all of your private containers and it's access to admin perms./bolt password [password] - Password protect a container./bolt mode (persist|no lock|no spam) - Change your bolt mode. Run the same command to turn it on/off.persist - Toggle player mode so you don't have to keep typing /bolt lock or /bolt unlock and other bolt commands.no lock - Everything you place is unlocked by default.no spam - Turns off spam bolt messages./bolt help - Displays all Bolt commands./bolt info - Displays who owns what item.
For more information on the Bolt plugin, you can visit their GitHub Wiki page.
Bedrock-specific:
/geyser help - Shows help for all registered commands./geyser advancements - Open the Java advancements menu./geyser offhand - Equips an offhand item./geyser ping - Shows your server ping./geyser statistics - Open the Java statistics menu./geyser tooltips - Toggle showing Advanced Tooltips (F3 + H on Java).
Miscellaneous:
/trigger duraPing - Enables ping on low durability./itf toggle visibility - Makes an item frame invisible./seen [playername] - Show the time that the player was last seen./sit - Makes your in-game character sit./dynmap [show|hide] - This will show/hide your character on the map (default = show)./lb or /stats - Links you to our leaderboards/stats page./map - Links you to our online live map.
Support/cosmetics:
/vote - Show all of the voting websites./voteshop - Opens the voting shop./buy - Opens the donator store GUI with pricing to take you to our external online shop. Here you can purchase donator perks such as chat-colour or ranks./tags - Opens the tag GUI to select a chat tag. Can be purchased with vote points./chatcolor - Opens the chat color GUI. Can be purchased with vote points and in the shop.
Discord:
/play - Discord music bot in the #bot-commands channel./grow a tree - Lists commands matching the grow a tree prompt line, used in conjunction with our #grow-a-tree channel.
Commands available to those who have donated to the server are available here. If you would like to see more details on what specific commands are available to each rank, please navigate to our store page here.
Nicknames:
/nick <nickname> - Ability to create your own nickname in-game. You can visit NickGen and their nickname generator will allow you to pick and choose colors, apply a gradient, and automatically create the line of text you need to use in-game.
- Nicknames that include italics, bolding, or underlines are not allowed in player names (only item names).
Item Naming:
/itemname - Allows you to change the name of the item you are holding in your hand, including special characters and colors.
/itemlore - Allows you to change the underlying lore or subtext of an item that is below its name when hovering over it, including special characters and colors.
Imageframe:
/imageframe - For a full list of command prompts, navigate to "commands" on the plugin page. NOTE: Imageframe is currently not working as intended given our recent update to 1.21.8, we are working on a fix. Apologies for the delay.
Head Database:
/hdb - Opens a database of heads (for decorative purposes).
/hat - Places whatever you are holding in your hand on your head!
Pets:
/pet data <type> - Opens the GUI to modify the selected pet type data, which includes variant changes, size, anger, sounds, etc.
/pets - Opens the menu to spawn in available pets.
Right-click on your pet once they have been spawned in to edit its data, alongside its name. More command information for SimplePets can be found here.
Movement:
/lay - Moves your player into the sleeping position.
/crawl - Moves your player into the crawl position.
Some features on the server require you to have the respective mod installed to utilize. If you are familiar with modded clients or are already using mods, skip to step 4. Otherwise, here’s a complete guide on how to install mods on Java Edition of the game.
How to Install and Use In-Game Fabric Mods:
1. Download and install the Fabric Loader. Make sure you keep the 'Create Profile' option checked, and that you get the successfully installed alert once done.
2. Open Minecraft launcher, select 'Minecraft: Java Edition' from the left panel, and then the 'Installations' tab from top. Hover over the version you just installed, click on the three dots, then edit. Click on 'browse', and go to any directory of choice (You will need the directory later), create a new folder and name it Minecraft Fabric (Can be any name), and select that folder to install the fabric client in.
Once done, click on 'Save' at the bottom of the launcher window.
3. Run the game once to get it installed. Make sure the word Fabric is mentioned at the bottom left corner of the splash screen when you are at the main menu. Now exit the game.
4. Now you need to install the mods themselves. Here’s the list of mods currently supported by the server. Download the versions compatible with your currently installed Minecraft version. Version mismatches may or may not work and can lead to stability issues and crashes:
5. Now that you have the mod files downloaded, go to the folder you made in step 2, and open the mods folder, paste the mod files there and you should be good to go.
If you are looking for a visual guide to the above download process, check out 'The Breakdown's' video.
Note: The Breakdown is not affiliated with TerraTrove, we are simply recommending their video as a helpful resource.
TerraTrove is available for both Java and Bedrock players on any device via crossplay. This section addresses issues related to using the Bedrock Edition of Minecraft on TerraTrove and provides resources to resolve the matters stated.
Useful Resource Packs:
Issues Related to the Server:
Staff Hierarchy and Collaboration
All staff members are approachable and committed to fostering a positive, inclusive, and supportive environment. Admins are responsible for critical decisions, while Moderators and Helpers assist with server management, decision-making, and community support. Staff members contribute input on server matters such as rule changes, events, and other key issues. They also help resolve player tickets, offering support and addressing player concerns. Helpers are promoted to Moderators when they have demonstrated responsibility and are trusted to use Moderator powers.
Admin
Responsibilities of Moderators and Helpers, plus;
Key Responsibilities:
Moderator
Responsibilities of Helpers, plus;
Key Responsibilities:
Helper
Key Responsibilities:
Event Manager
Key Responsibilities:
If you are interested in becoming a TerraTrove staff member, please refer to our frequently-asked-questions.
The list of frequently asked questions below involves many subjects on the server. If you think a question and answer deserves to be added, please do not hesitate to let us know. Try quick-navigating this page using Control+F.
How do I apply for the whitelist?
Go to #apply, open the dropdown menu, and select Whitelist Application. You will receive a DM from @Appy#0756 with the application questions.
My application was rejected. Can I resubmit?
Yes. Please avoid one-worded replies wherever possible, and do not try to rush the application.
How long does the application review process take?
Our admin in charge of applications will review them as soon as they can. It usually takes minutes if they are online; but if away, could take up to 24 hours. Please do not ping staff regarding wait time.
Will I be notified if my application got approved/rejected?
Once the review process for your application is complete, you will receive a direct message from @Appy#0756 notifying you of the decision.
How long do the seasons usually last?
The duration of the running season is not bound to any predefined timeframe; it’s the player activity that determines season lengths. Seasons 1 and 2 lasted 3 months, and Season 3 lasted around 6 months.
When do new seasons start, and how will I know?
New seasons of TerraTrove will begin once our Staff team conducts a poll on whether or not players are interested in starting fresh and finding a new world to play on. The poll will be conducted in the announcements channel on Discord and will function similarly to our suggestions polls, which require an 80% voting rate to pass. Once passed, our Staff team will take action accordingly and begin prepping for a new season, all of which will be outlined in our Updates channel.
What are the criteria for world reset?
Once the player activity declines noticeably, we post a poll asking players if they want to conclude the current season. If that poll passes with 80%+ in favor of reset, we start the preparations for wrapping up the current season to move on to the next. Otherwise, the season continues until the next poll which comes in a month. This continues until the poll passes.
How do I contact staff about any server/discord matter?
If you have any concerns (griefed/destroyed base, stolen from, other players harassing you, a simple question you can’t find answers to anywhere else, etc.) you would like to share with the staff team, go to the #create-ticket channel, and press the open ticket button. Describe your case as clearly as you can and we will review as soon as possible. Tickets are private and only the staff members and any other player involved with your case will be able to view them.
My application got approved. Now what?
Congratulations! Now you just need to attempt logging into the server. You will receive a 4-digit code that you need to directly send to the @TerraTrove#2502 bot. Once done, you can join the server and start playing.
I get an error when I try to DM my code to the TerraTrove bot.
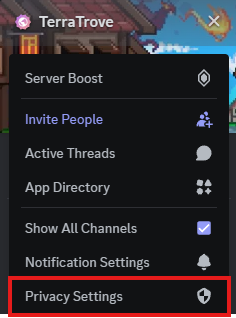
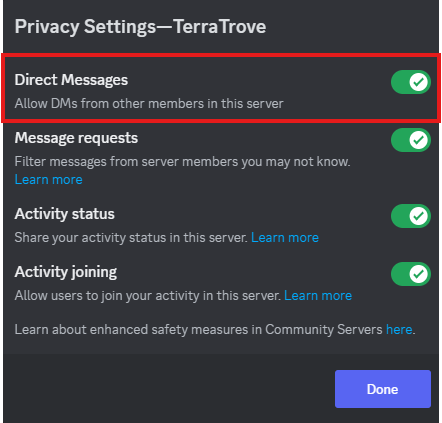
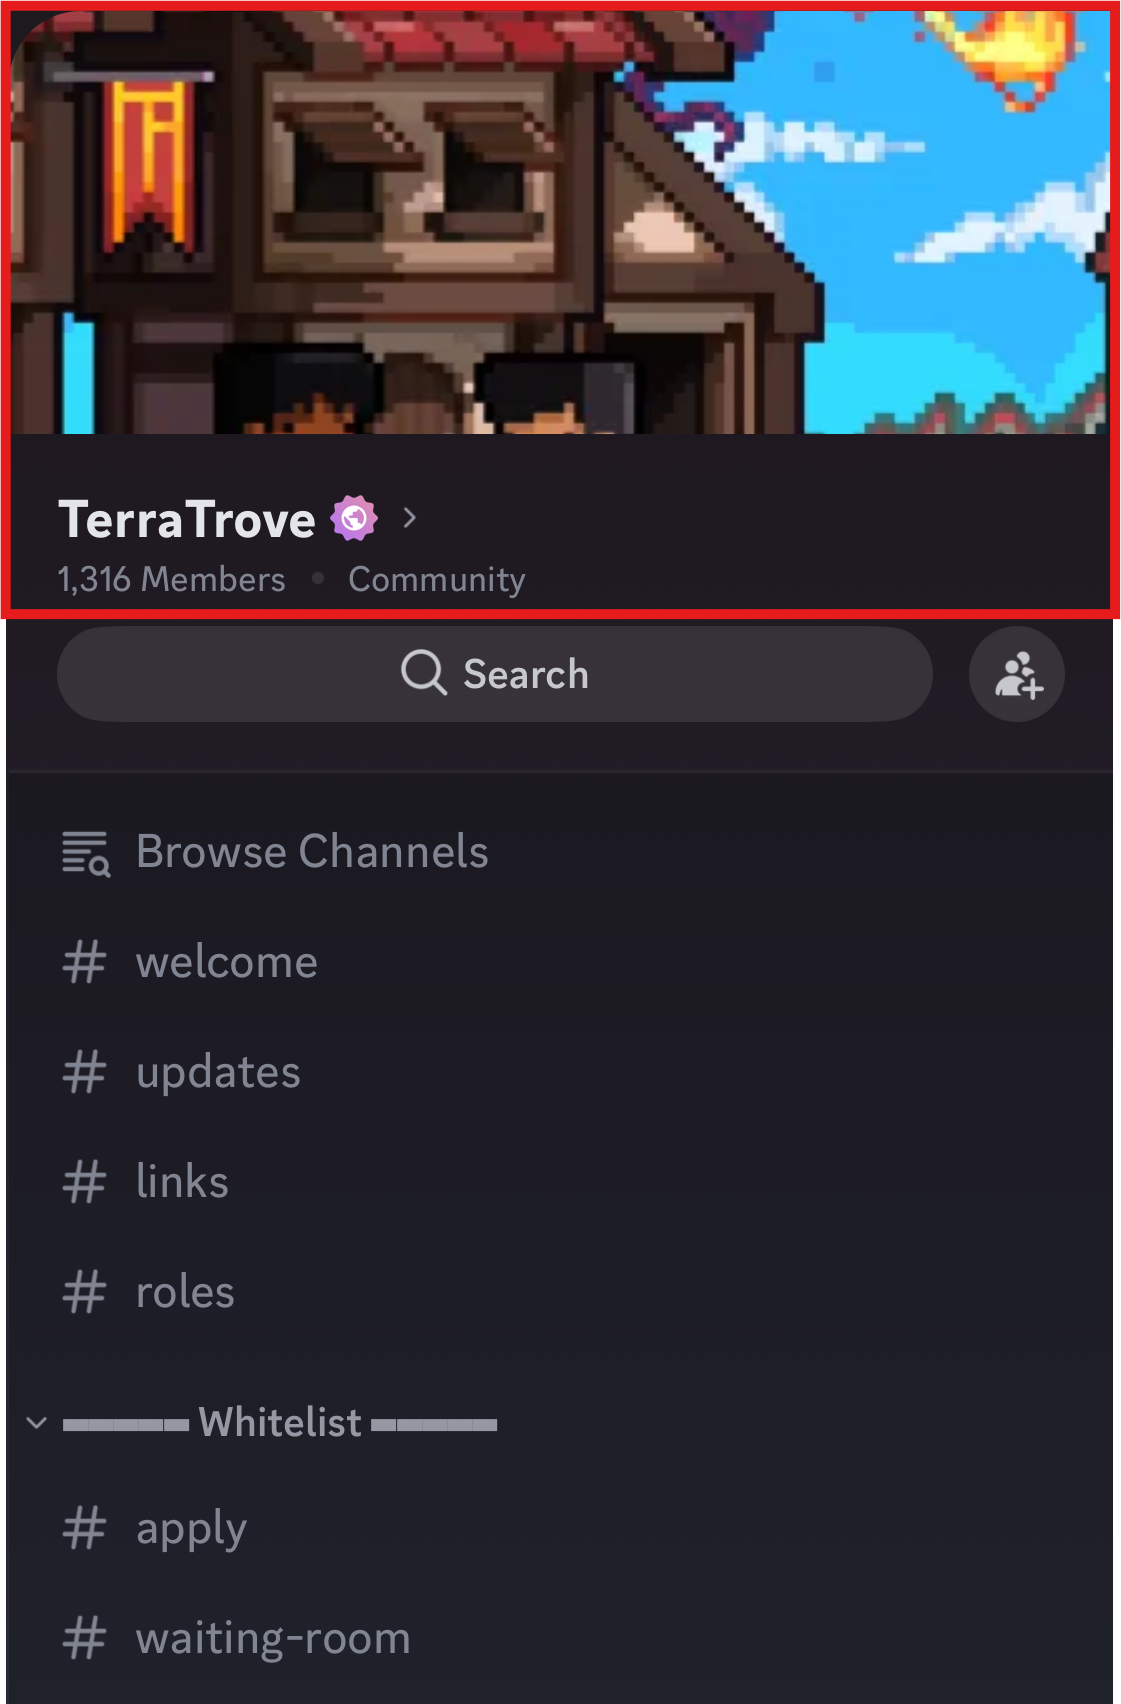
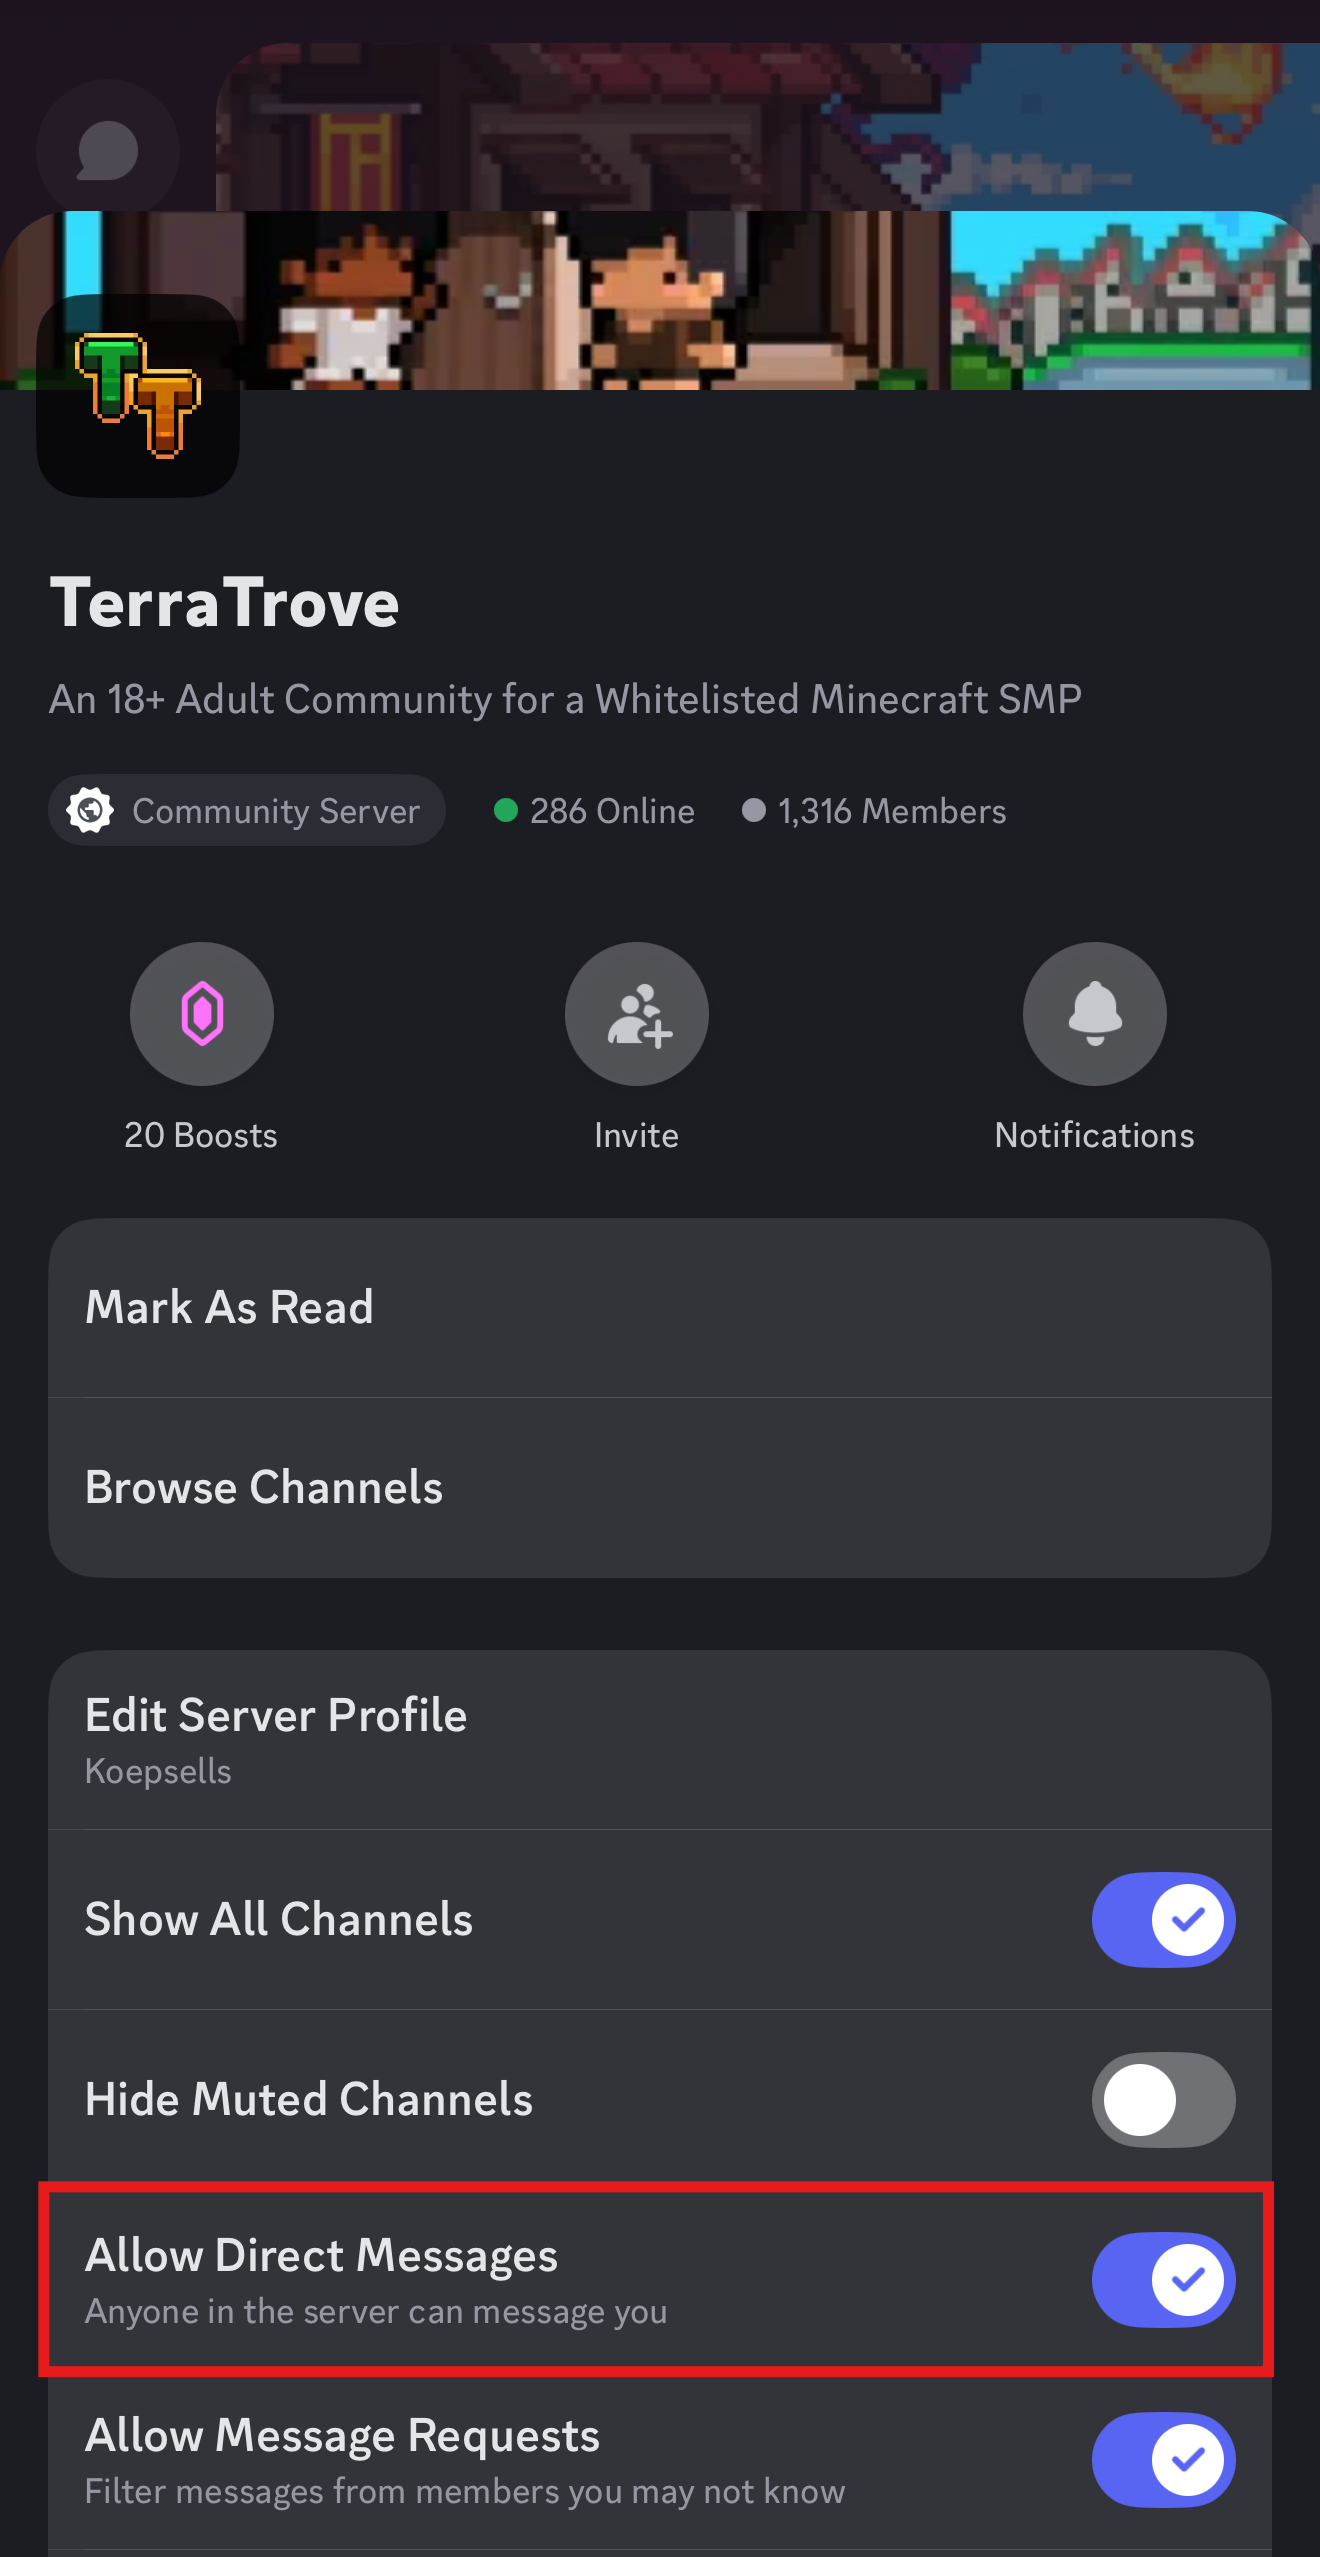
This is usually due to your discord privacy settings not allowing direct messages from other users or bots. To resolve this, if you are on Discord for PC; click on the 'server title', and then on 'Privacy Settings', make sure the 'Direct Messages' option is toggled on. On mobile, tap the server title, and make sure the 'Allow Direct Messages' option is toggled. If you are having difficulty following this, refer to step 5 of our wiki page on How To Get Whitelisted for a visual.
How do I open a shop?
All shops must be approved before they can be built. #shops-trading holds all the details regarding shop approvals.
Do I have to apply again if I change my Minecraft username?
No, you don’t need to. The server will announce your name change on the first join.
How do you enable the in-game voice chat?
To use the in-game voice chat feature, you will need to install client-side mods. Refer to our Mod Installation Guide for more information.
What are tags/chat colors? How do I get them?
Tags are the simple icons that appear before your username in the chat. Chat colors will change your messages from default white to one of the available colors you choose. Both tags and chat colors can be obtained through The /voteshop command, but you can also purchase the chat colors through our store. You can get up to 5 vote points daily through the /vote command.
What are ranks? How do I get them?
Ranks are granted to donors who help keep the server alive, and they come with specific perks. Check them out at our store.
Can I Join the Staff/Event Manager team?
Thank you for your interest. Helper+ operates on informal recruitment, implying that players who are actively engaging with the server and going above and beyond to help others will be considered for our staff team; there is no official application and staff remain impartial in our selection. Event manager applications will open throughout the season, and application details for those interested will follow suit. Recruitment for EMs is up to the discretion of the current managers.
What’s the average player count on the server?
This is not a fixed figure, but to give a rough estimate, season 3 started with around 30~ players online on average and gradually decreased down to 5-15 in the final couple of months. We are expecting these numbers to go up in future seasons.
What is the world seed?
The world seed is not provided to any players to maintain fairness. Players who attempt to use alternative applications to crack and abuse the seed will be punished.
Is the use of client-side mods allowed?
You are allowed to use mods as long as they do not give you an advantage over other players. Mods like Litematica, Freecam, and Fullbright are allowed. X-ray, Litematica printer, and alike are not allowed. If you are not sure which category your mods of choice fall in, please open a ticket and we will let you know if you can use them.
Are large farms/trading halls allowed?
To an extent, yes. Staff maintain the discretion to evaluate bases and farms for entity moderation purposes, and if a specific farm is determined to have a significant negative impact of server load, the player(s) will be asked to edit it. Trading halls are allowed, but to cut down on private halls, there will be a public hall that will cover most villager needs for all players. If you are still planning on creating a large private trading hall, staff approval via #create-ticket is required.
How can I claim land for my base?
To claim an area for your base, go to #player-bases and create a post following the 'post guidelines' with screenshots of the dynmap with a visible named banner, alongside the appropriate coordinates.
Are there any in-game teleportation features?
There are no means of teleportation on the server as we try to maintain the most vanilla experience possible.
Can I use more than one game account?
You can only be online on the server with one account. However, if you want to be able to play using multiple devices you can link your Java and Bedrock accounts using this guide.
Can I play on the server using my console/phone?
Yes, the server is crossplay and you can use any device that supports Minecraft to play on the server.
I have switched from Bedrock to Java. Can I continue my progress with my Java account?
You can link your Java and Bedrock accounts using this guide.
What can I do if I think my death or loss of items is caused by lag or a player being unfair?
In case-sensitive situations that might require an inventory rollback, it is entirely up to the staff to determine whether a rollback is required. To be safe, you can familiarize yourself with using Windows+G and then pressing Record the last 30 seconds in Xbox Game Bar to have video evidence of a recent death. Xbox Game Bar often has issues picking up the Minecraft application; a popular alternative if you have an NVIDIA GPU is NVIDIA ShadowPlay, which includes the same features and can record for longer instances. If recorded evidence is available, please present that and any other evidence to staff in #create-ticket.
I don't like phantoms, how do I get rid of them if nobody wants to sleep?
You can get rid of phantom spawns on your personal player just by getting in a Minecraft bed for a few seconds, and then once you leave the bed, you will no longer have phantoms chasing you for the next 3 days, similar to vanilla Minecraft mechanics. Since our server is a large SMP, many players are often doing different tasks and activities, and may or may not want to hit the 20% of players required to sleep. If you are having issues with phantoms, you can still get rid of them.
This page has been archived and is intended for viewing purposes only.
In this section, everything you need to know regarding spawn, such as key buildings & core mechanics, can be found right here!
Starter House
Located near spawn, there is a starter house (images shown below) located at [-20, 20].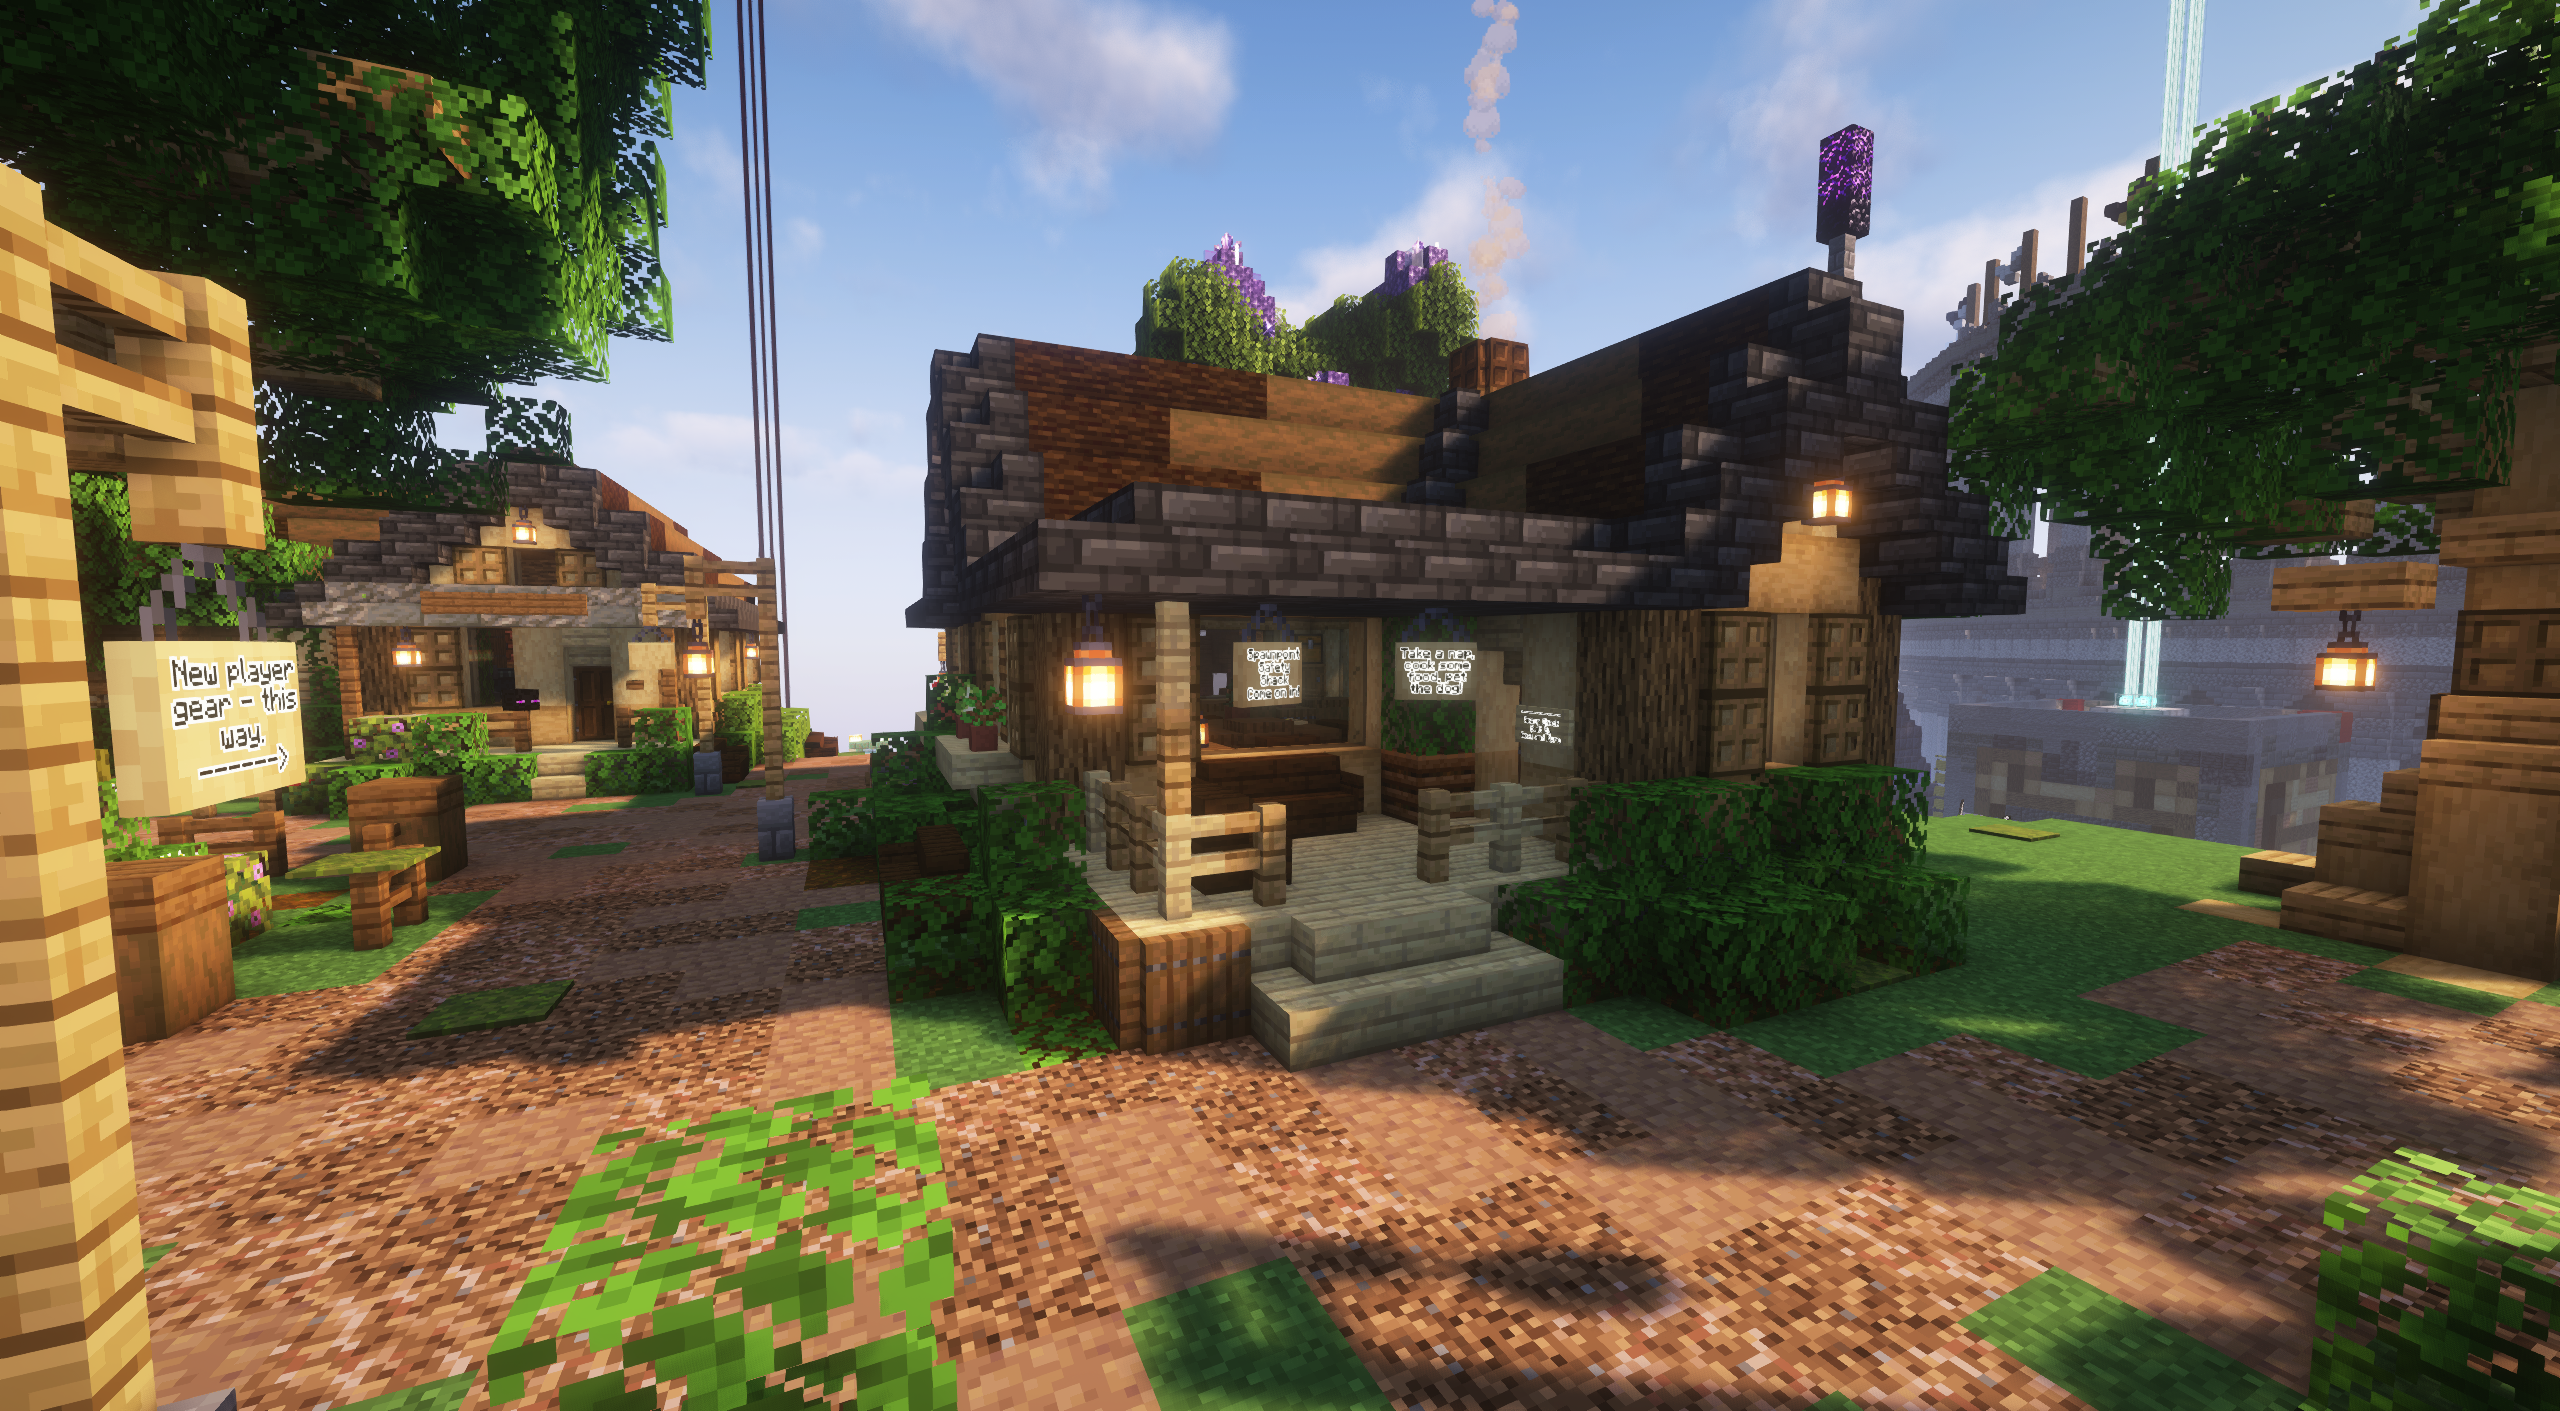
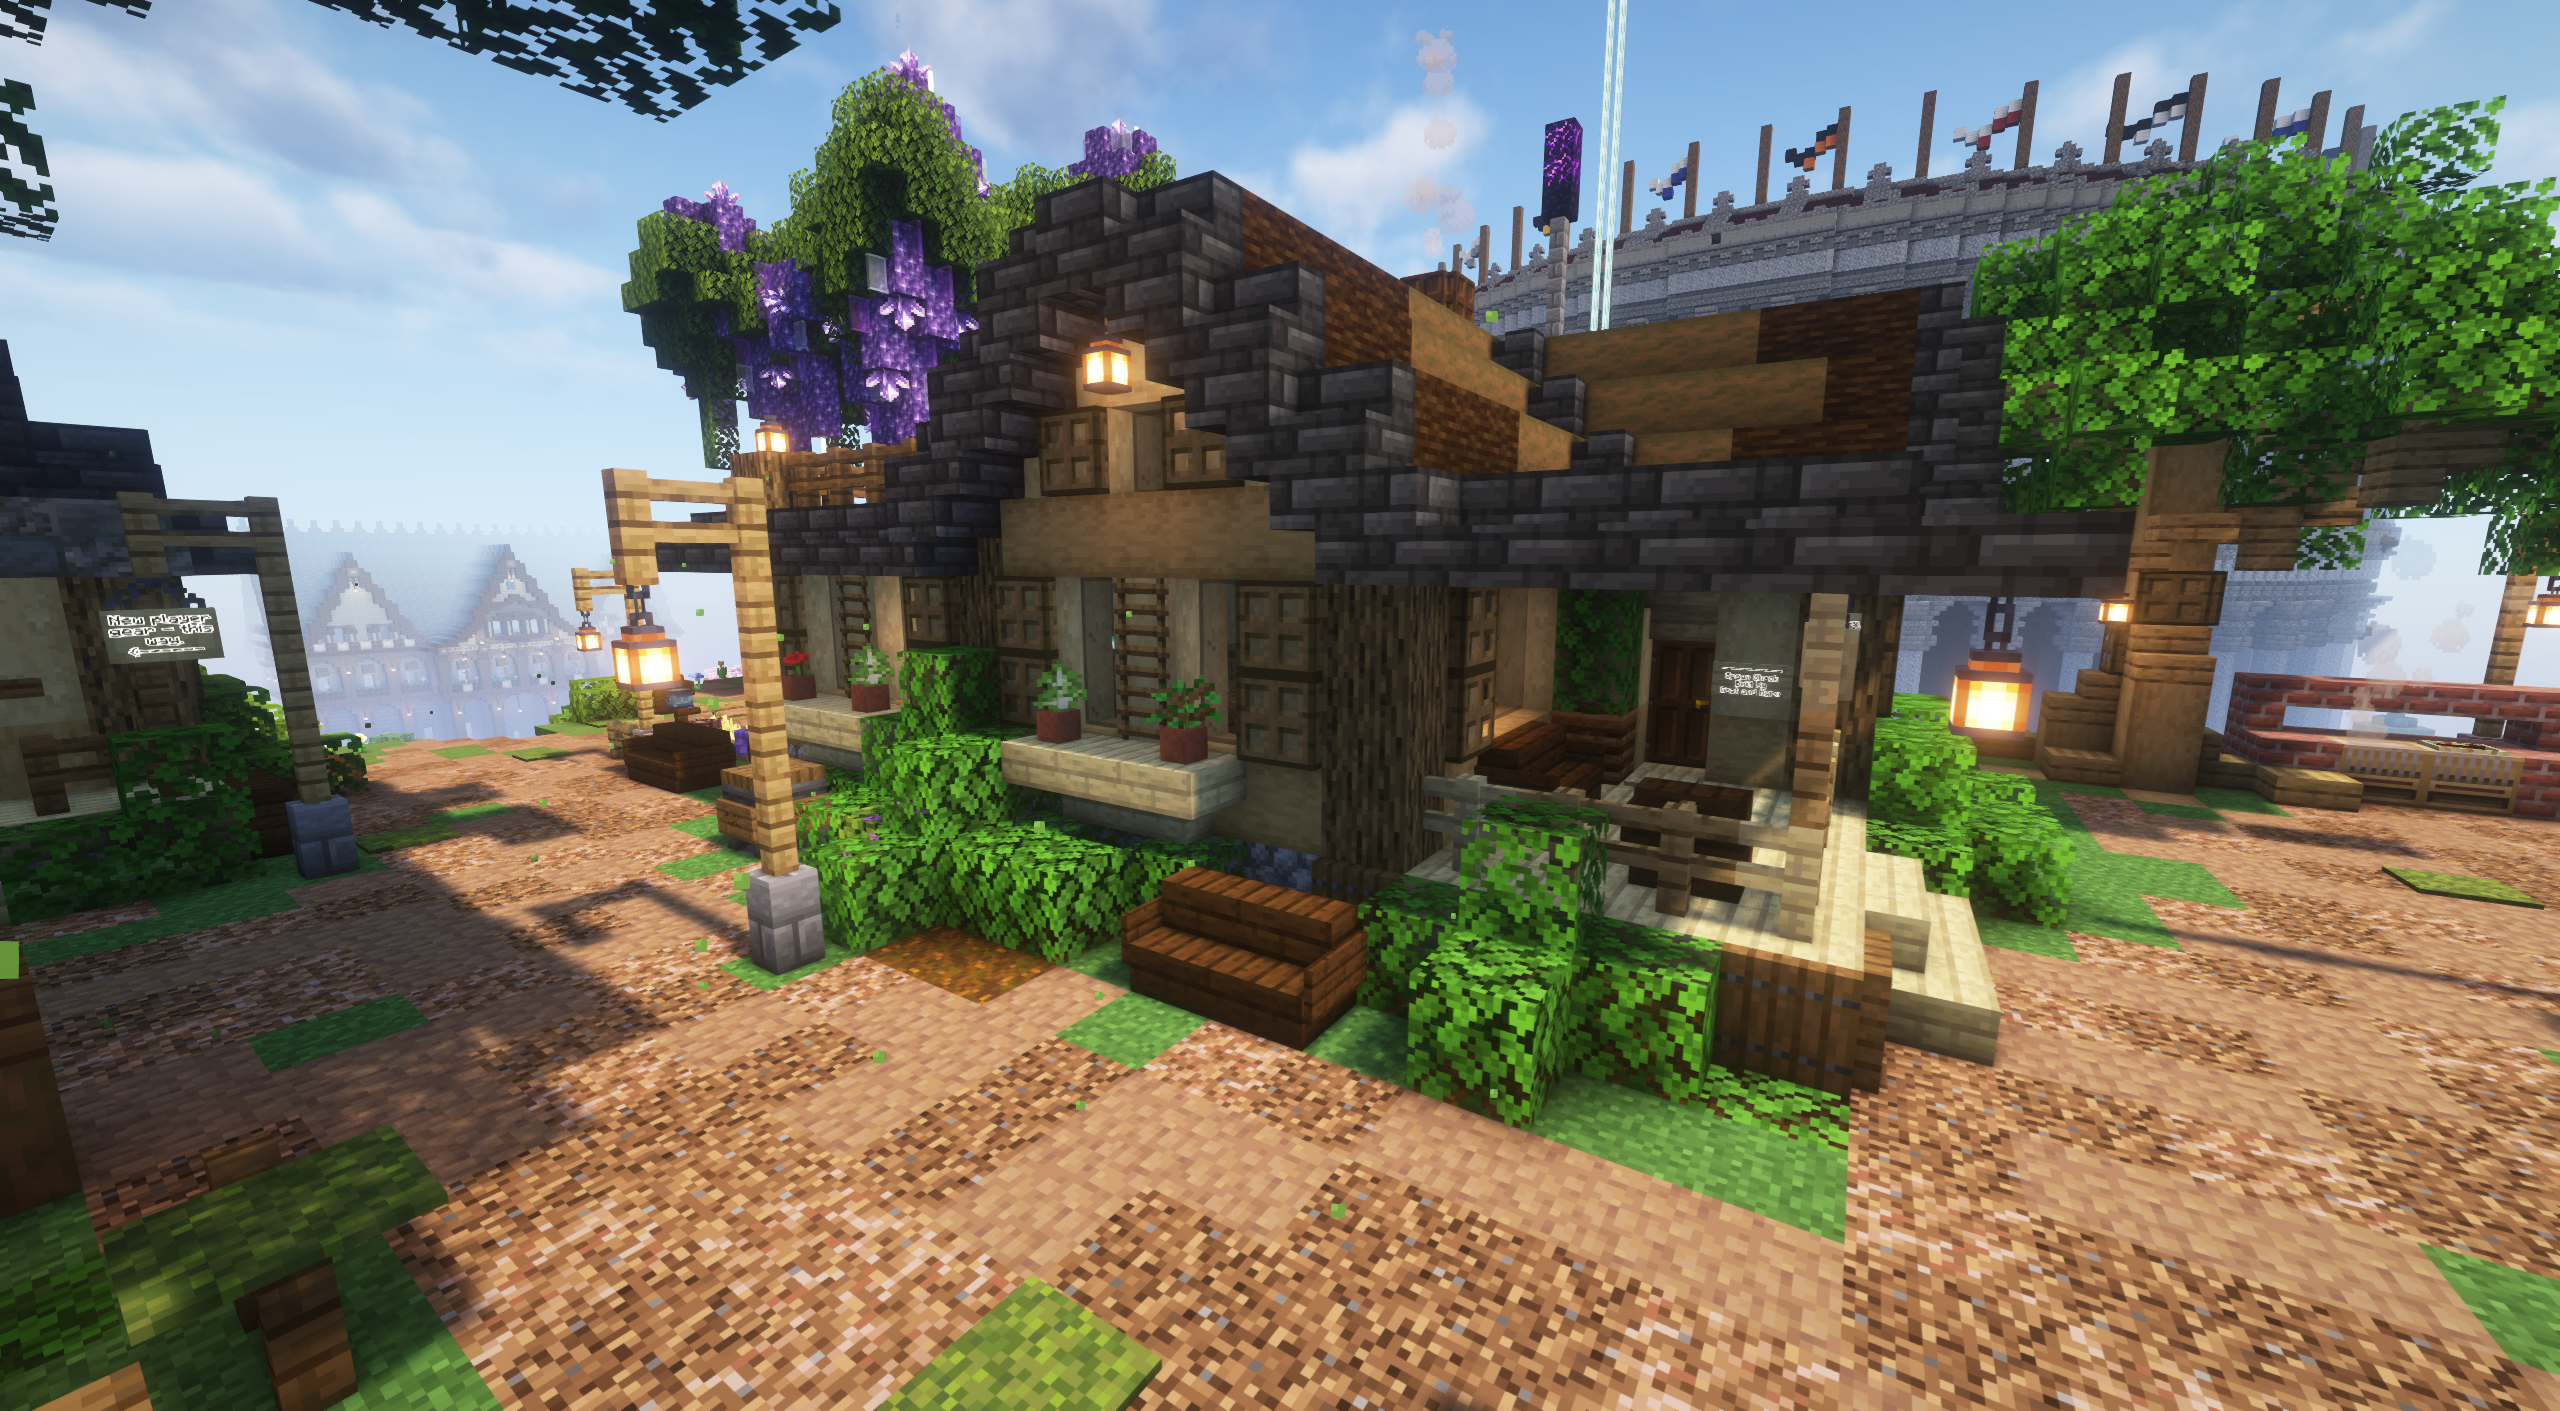
The spawn house is a safe-haven for players, where they can sleep without the risk of being attacked by phantoms and chill out in general.
It's also worth noting that upon entering, there's a small area where you can play some music discs in a jukebox!
Blacksmith
The blacksmith is another important structure for new players, and was one of the first structures in spawn to be built. This building supplies newcomers with a fresh set of starter gear.
It is located at [-50, -30], and an image of the building is showcased below.
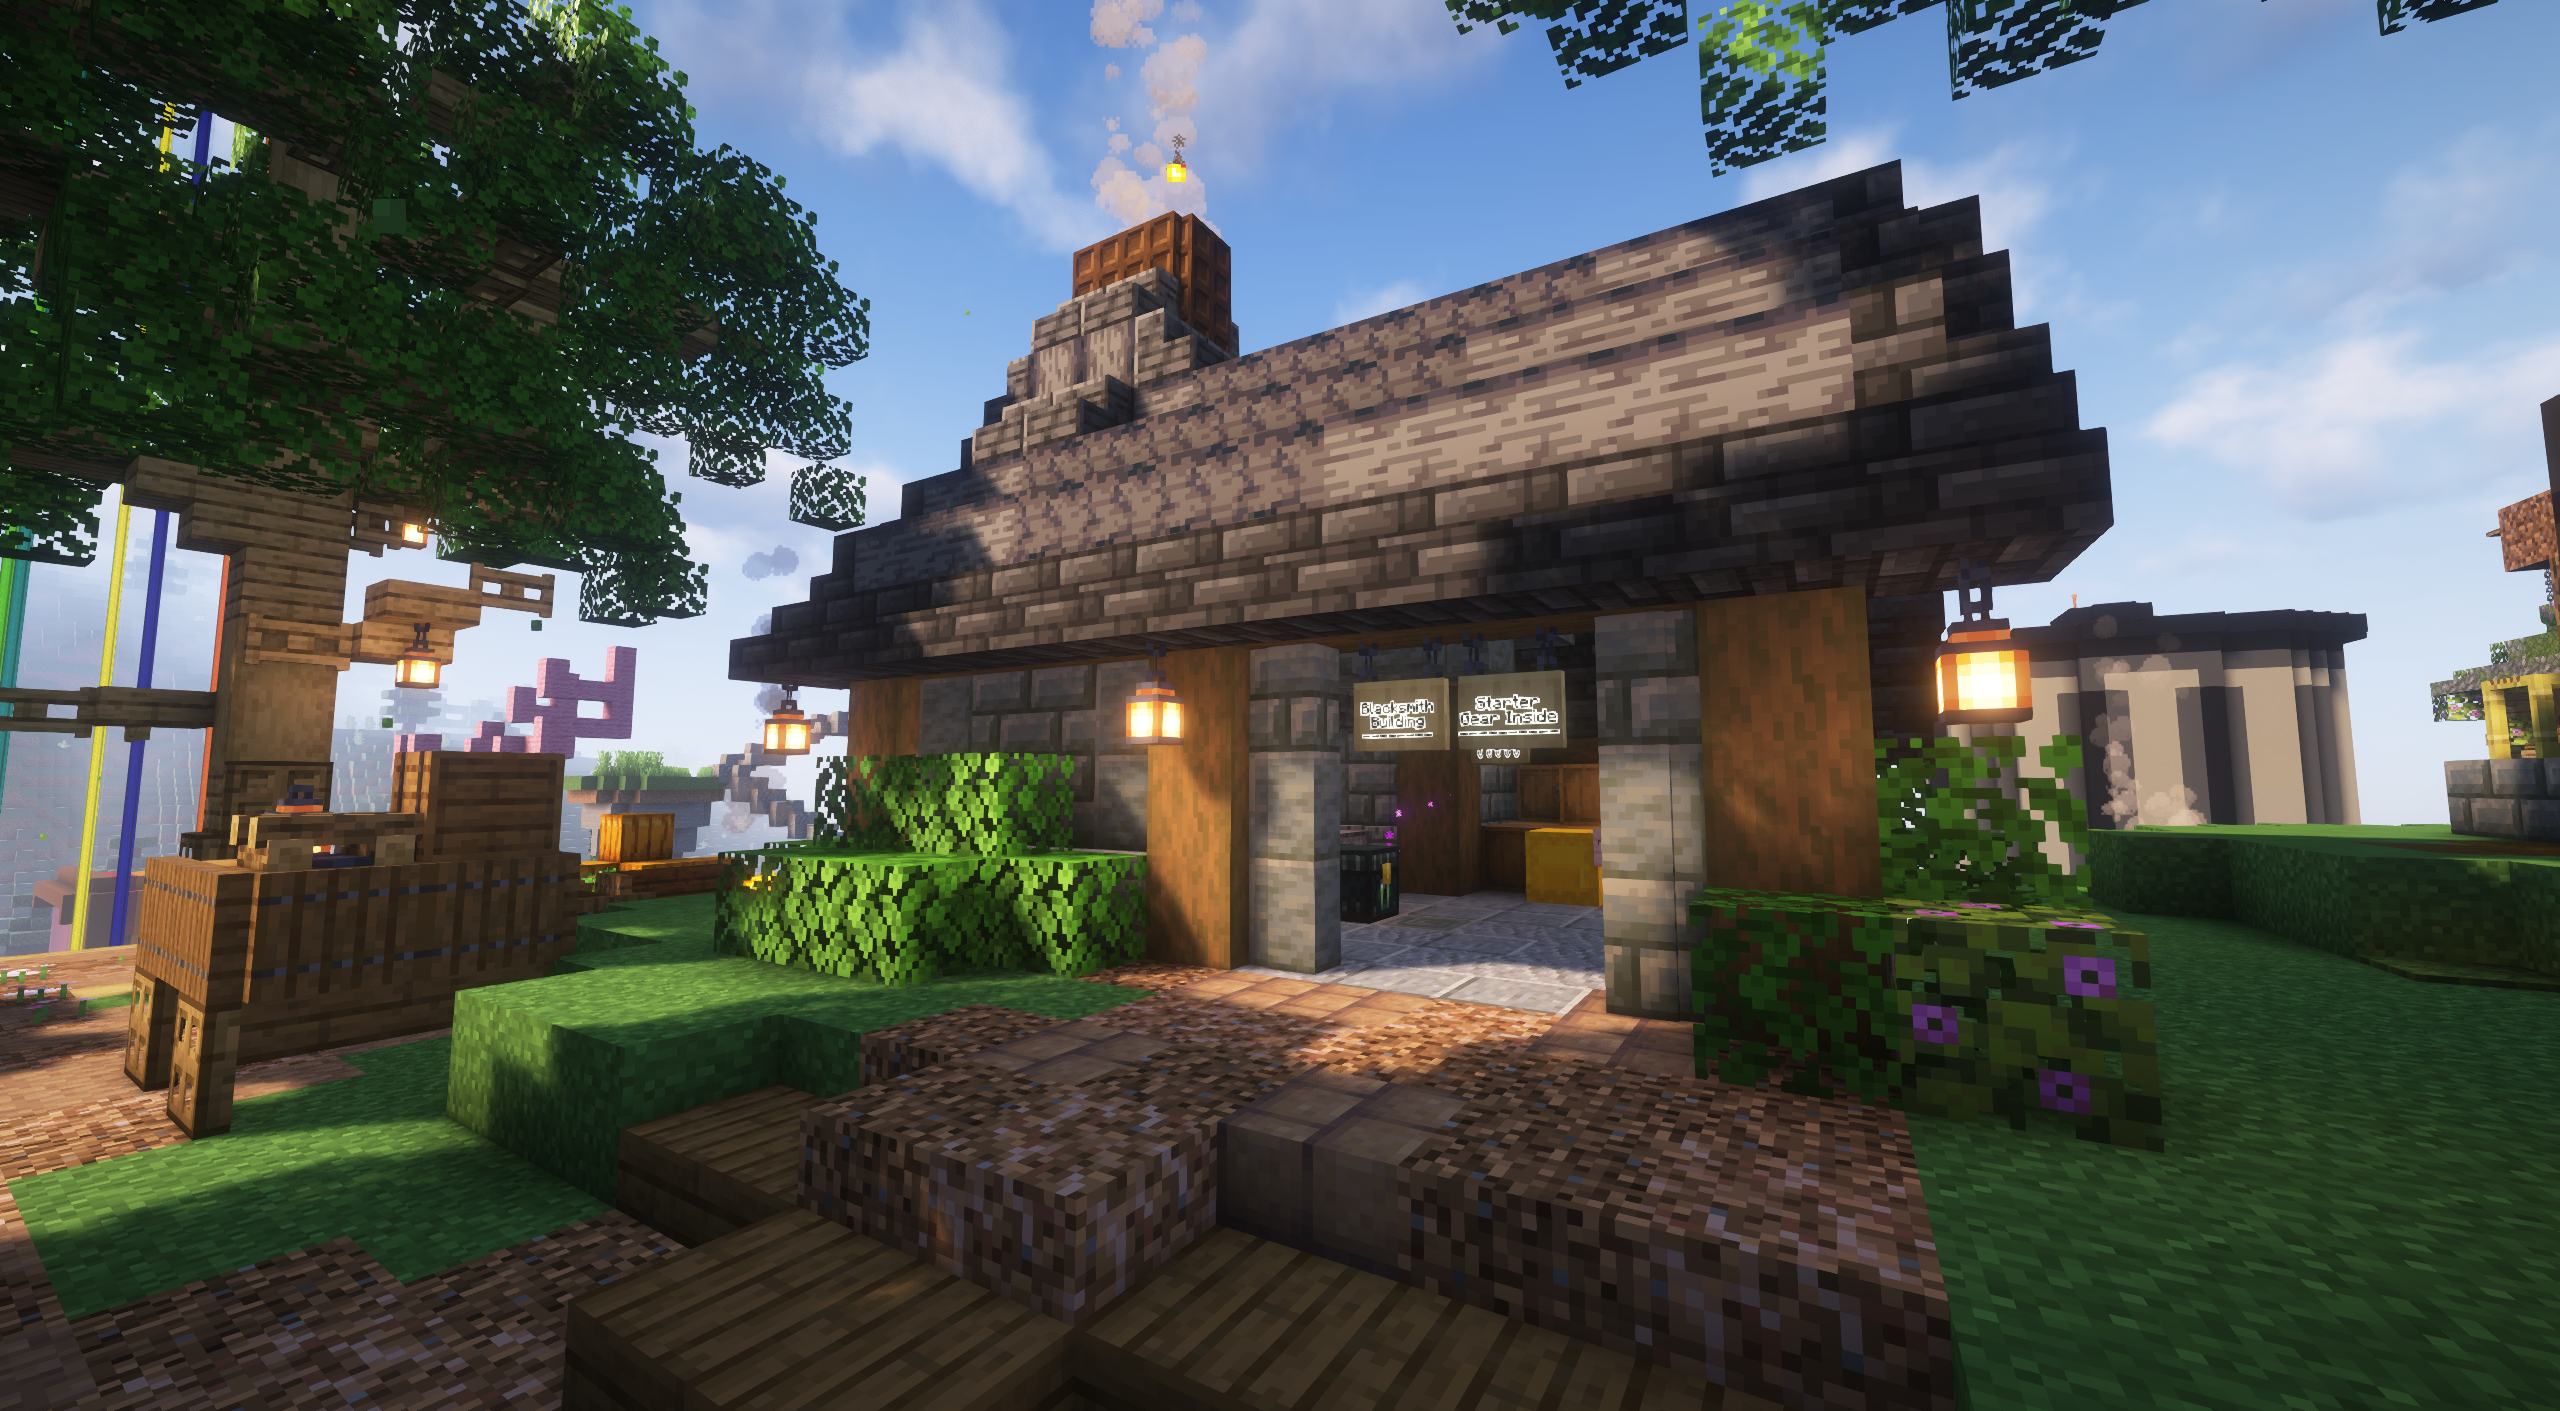
Upon entering the blacksmith, there will be a marked button that players can press to obtain some starter gear and resources. Please only press the button once.
Post Office
At spawn, one of the most important structures frequently used by other players to deliver items and belongings is the post office.
The office is a notable building, which is hard to miss, and is located at [-30, -40].
Images for the post office can be seen below.
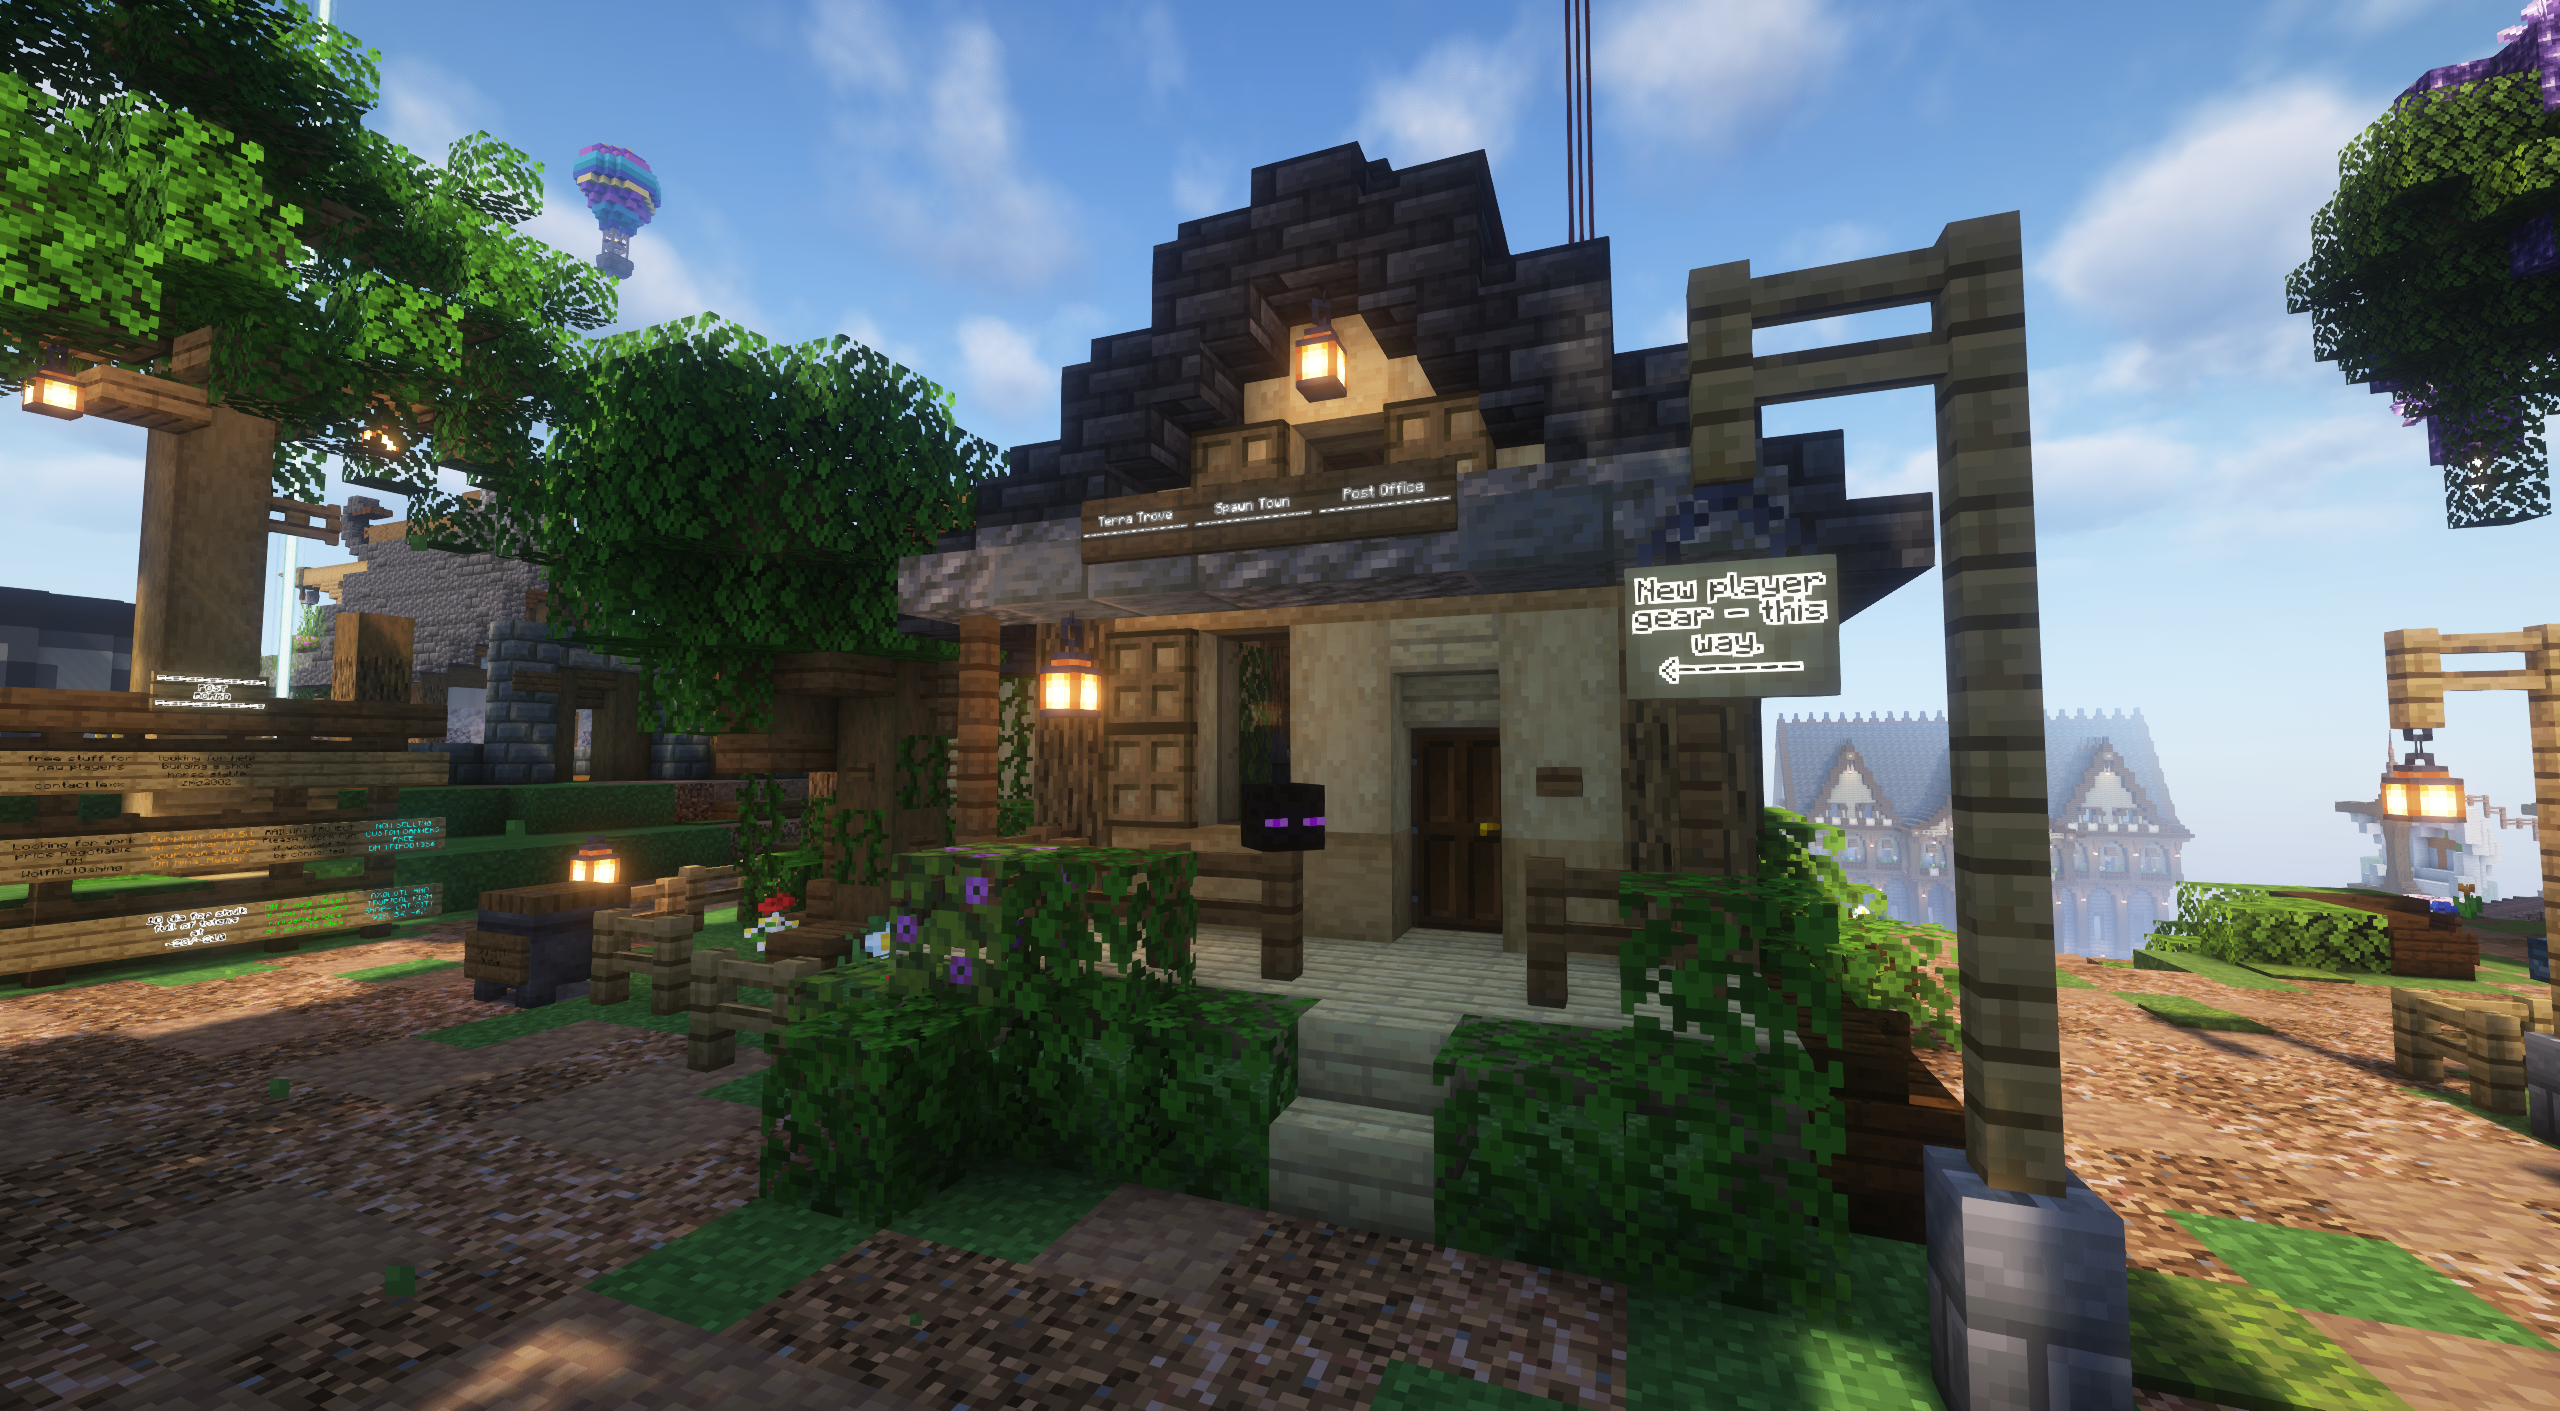
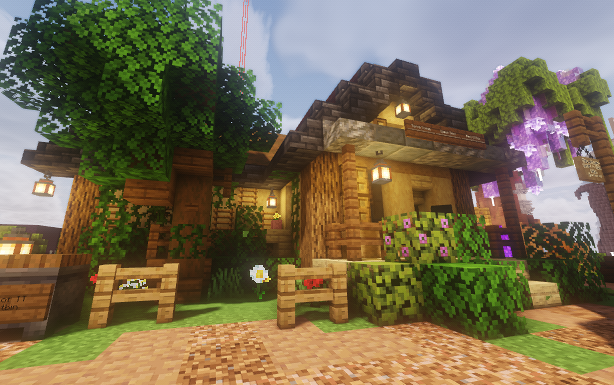
The post office is, as you'd probably guess, an area where each player has their own kind of mailbox.
Items can be delivered to certain boxes in the event that a player may not be able to currently make trades with other players (obviously, there are many scenarios in which it would be used).
When you enter the post office, you will see a lectern with a book - Inside the book, you will see a list of players with a number next to their name. This number represents their PO box.
If you don't have a PO box, but would like to obtain one, check to see if there are any unassigned numbers first and put your name next to the corresponding number (you would also need to change the sign name on the box to your name). In the event that there are no more spaces, contact a staff member through a ticket and the team will work towards getting you a working PO box.
The Tree of Life
One of TerraTrove's most significant structures would be the Portal hub, connecting the Overworld to the Nether through what is often called 'The Tree of Life'.
This structure can be found at [-10, -60], and an image can be shown below.
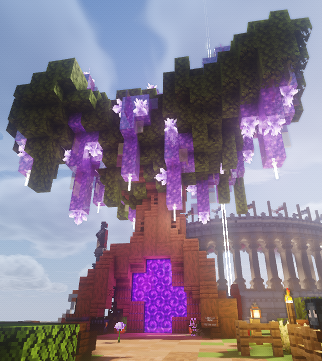
When you go through the portal in the middle, it will take you to the Nether Hub, which is described more below.
Nether Hub
The Nether Hub is one of the other vital locations at spawn, which is used to cover long distances in the Overworld.
It is located at the portal in the Tree of Life, and an image can be seen below.
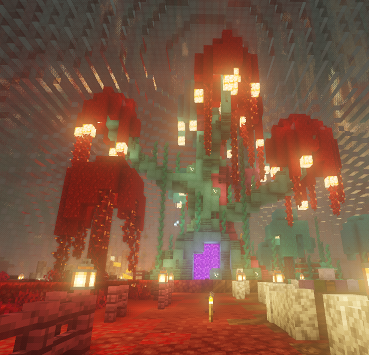
The Nether's portal tree resembles the Overworld's Tree of Life in the sense that it has a more Nether-Like feel to match the typical environments in the Nether.
In each main direction (North, East, South, and West), there's a 3-block wide ice path which extends +-1250 blocks on its respective axis. Within' less than a minute, you can traverse all the way to the end of the paths, which makes traversing long distances effortless and easy!
Shopping District
Around spawn, a shopping district is used to display and sell items to other players. The main currency is diamonds, and more information regarding our shopping and currency process can be found here.
Spawn Development
Staff members are constantly making changes to spawn. To see more information regarding this, check out the link here. Keep in mind that you have to be a part of the server to see this thread.
Public Projects
There is always a range of public projects that are being worked on in spawn, whether it's down to landscaping areas, obtaining a list of items, or many other things!
If you wish to contribute to a project, contact staff members through a ticket.